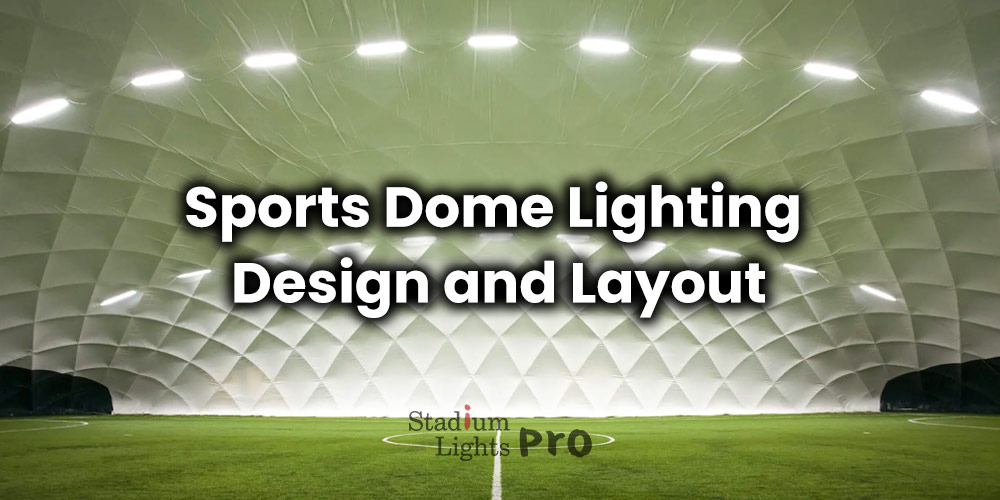
Lighting inside a sports dome can quietly make or break the whole experience. Players rely on clear visibility to perform at their best, spectators expect a comfortable and immersive atmosphere, and operators want systems that don’t drain energy budgets or demand constant maintenance. Dome structures add another layer of complexity, with their massive spans, curved surfaces, and multi-use demands. A thoughtful lighting design balances performance, comfort, and long-term value, while still being flexible enough for different sports and events.
Getting there takes more than choosing bright fixtures and mounting them high. It calls for an understanding of how domes behave as lighting environments, how standards guide design decisions, and how layout strategies shape the way light actually lands on the playing surface.
Understanding Sports Dome Environments
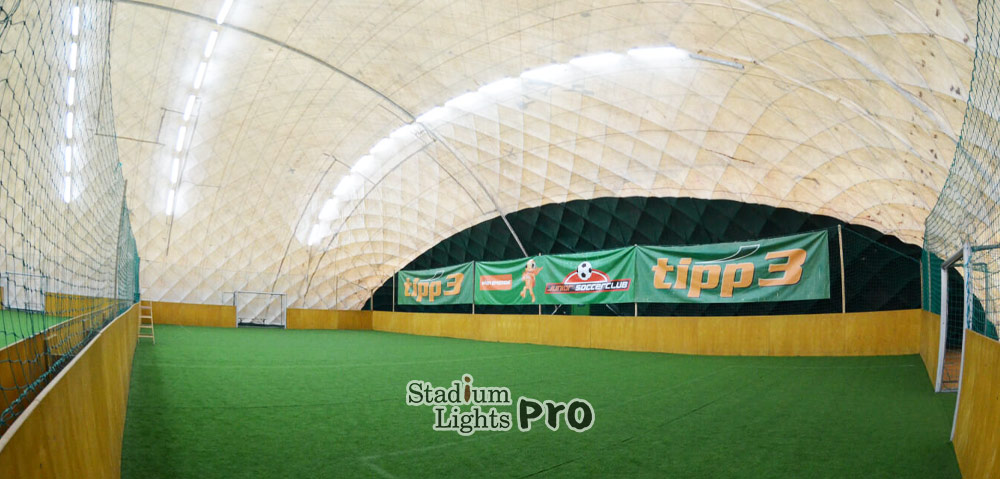
Sports domes are very different from traditional indoor halls or outdoor stadiums. The scale alone changes everything. Ceiling heights often range from 20 to 60 meters, sometimes even more for large air-supported domes. At those heights, light has a long way to travel before it reaches the field, which affects brightness, uniformity, and glare.
The dome shape itself plays a major role. Curved roofs and tensile membranes can reflect light in unpredictable ways. Materials such as PVC fabric, ETFE, or coated steel panels usually have high reflectance values, sometimes above 70 percent. That can help boost overall brightness, but it can also create hot spots or veiling reflections if the lighting layout isn’t carefully planned. In some domes, reflected light contributes nearly 30 percent of the perceived illumination on the field, which is not something designers can ignore.
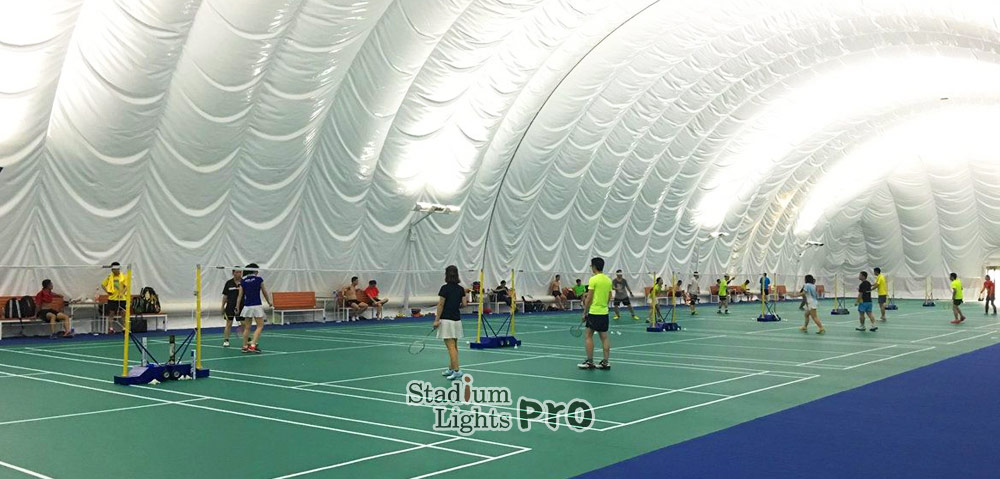
Another factor is how the space is used. Many sports domes host football, tennis, athletics, training sessions, community events, and even exhibitions. Each activity comes with its own lighting needs. A football match may require horizontal illuminance levels of 500 to 750 lux for training and up to 2000 lux for broadcast games, while a casual community event might feel comfortable at 300 lux. Designing for that range without overlighting the space takes planning.
Daylight also enters the conversation. Some domes include translucent roof panels or sidewalls to bring in natural light. While that can reduce daytime energy use, it introduces changing light levels and potential glare from low sun angles. Artificial lighting has to work with daylight, not fight against it, which is why dimming and zoning strategies matter so much in these environments.
Lighting Standards and Regulations
Why standards matter in sports dome lighting
Lighting design for sports domes never really starts from zero. There’s a whole framework of international and regional standards that guide how bright the space should be, how evenly light spreads, how glare is managed, and how colors appear to both the human eye and broadcast cameras. Groups like the Illuminating Engineering Society (IES), CIE, European EN standards, and sports authorities such as FIFA, World Athletics, and FIBA all influence how modern domes are lit.
These standards exist because sports lighting has been studied for decades. Player reaction time, referee accuracy, spectator comfort, and broadcast image quality are all affected by lighting conditions. Having a shared set of benchmarks helps designers, owners, and operators stay on the same page, especially when a venue is expected to host official competitions or televised events.
| Lighting Aspect | Typical Values |
|---|---|
| Training / Community Use | 300–500 lux |
| Competitive Matches (Horizontal) | 1000–1500 lux |
| Broadcast / International Events (Horizontal) | 1500+ lux |
| Broadcast Vertical Illuminance | 1400–2000 lux |
| Minimum Uniformity Ratio | 0.7 |
| Common Target Uniformity (Top-tier venues) | 0.75–0.8 |
| Unified Glare Rating (UGR) | < 22 |
| Color Temperature | 4000K–5700K |
| Color Rendering Index (CRI) | ≥80 (≥90 for broadcast) |
Illuminance levels and uniformity expectations
Illuminance is usually the first number people ask about, but it’s more nuanced than simply “how bright is bright enough.” In many professional indoor football or multi-sport domes, the average horizontal illuminance on the playing surface typically sits between 1000 and 1500 lux for competitive matches. Training sessions or community use may drop closer to 300 to 500 lux, while international tournaments and broadcast events often push well beyond 1500 lux.
Uniformity is just as closely watched. Most standards recommend a minimum uniformity ratio of 0.7, meaning the darkest areas of the field should still receive at least 70 percent of the average light level. In practice, many top-tier venues aim for 0.75 or even 0.8, because athletes can easily notice uneven patches when moving at speed. Poor uniformity doesn’t just look bad, it can affect depth perception and timing, especially in ball sports.
Vertical illuminance and broadcast requirements
For venues with broadcast ambitions, horizontal light levels are only part of the story. Vertical illuminance, especially toward main camera positions, becomes a major focus. High-definition and ultra-HD broadcasts usually require 1400 to 2000 lux of vertical illuminance, measured at player height, to ensure faces, jerseys, and the ball appear clear and well-defined on screen.
Camera angles also matter. A dome hosting televised matches may need to satisfy multiple camera directions at once, which means lighting has to be carefully balanced across the entire volume of the space. That’s one reason sports dome lighting often uses a higher fixture count with more precise aiming, rather than relying on fewer high-output luminaires.
Glare control inside large dome structures
Glare is one of the trickiest parts of dome lighting. Standards commonly reference Unified Glare Rating (UGR), with many indoor sports facilities targeting values below 22. In reality, achieving that inside a dome is not always straightforward.
Players frequently look upward to track balls, and spectators often have wide sightlines that cut across the roof structure. Glare can come directly from luminaires, but also indirectly from reflections off curved roof membranes or metal panels. Some dome materials have reflectance values above 70 percent, which can amplify glare if fixture placement isn’t carefully thought through. Designers often use tighter beam control, careful aiming angles, and fixture shielding to keep discomfort glare at manageable levels.
Color temperature and color rendering considerations
Color quality plays a much bigger role than many people expect. Most sports lighting standards recommend a correlated color temperature between 4000K and 5700K, which tends to feel bright, clean, and alert without being overly harsh. Warmer tones can make fast-moving action look dull, while overly cool light can feel uncomfortable during long events.
Color rendering index is another key metric. A CRI of 80 is usually considered the baseline for sports applications, but broadcast venues often push for CRI 90 or higher. That extra color accuracy helps cameras capture natural skin tones, team colors, and sponsor branding without distortion. Inconsistent color rendering across the field can become obvious on screen, even if spectators don’t immediately notice it in person.
How standards shape real-world design decisions
Following lighting standards isn’t just about ticking boxes for approval. They directly influence fixture selection, layout density, mounting heights, and control strategies. A dome designed to meet only minimum training requirements may need half the lighting power of a venue aiming for international broadcast compliance. That difference can mean hundreds of luminaires and a significant gap in both upfront cost and long-term energy use.
At the same time, standards give everyone a common reference point. When designers explain why a dome needs 1500 lux instead of 800, or why additional fixtures are required for vertical illuminance, those numbers carry weight because they’re backed by established guidelines. They help justify design choices, protect future flexibility, and reduce the risk of expensive changes later on.
Key Lighting Design Objectives
Visual comfort for players and spectators
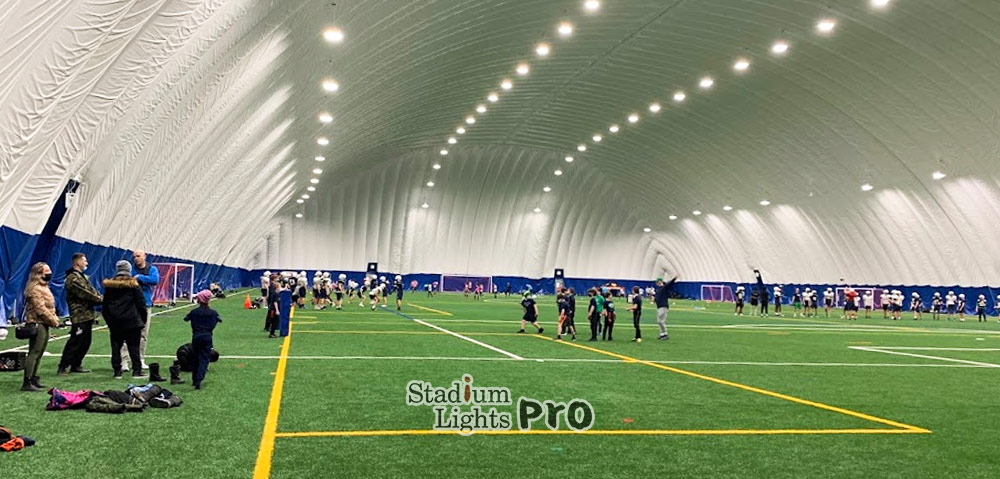
Every sports dome project starts with a few clear expectations, even if they’re not always spelled out in a formal brief. One of the first things people notice is visual comfort. Players need to follow fast-moving balls, teammates, and opponents without losing sight because of glare, shadows, or sudden changes in brightness. In sports like football, tennis, or badminton, the ball can travel at speeds over 150 km/h, so even a split-second loss of visual clarity can affect performance.
Spectators feel it too. If lighting is too harsh or uneven, eyes get tired quickly, especially during matches that last one to two hours or more. Good dome lighting feels bright but not aggressive, and that balance usually comes from controlled optics and thoughtful aiming rather than simply pushing higher wattage. Comfortable lighting tends to go unnoticed, which is often a sign it’s doing its job well.
Uniformity and consistent light distribution
Uniformity across the playing surface is another big goal that designers spend a lot of time chasing. When some areas are noticeably darker than others, players can misjudge distances or timing, especially in fast-paced sports. Research in sports vision has shown that uneven lighting can reduce visual performance by 10 to 15 percent, which is more than enough to influence outcomes at a competitive level.
In a sports dome, achieving smooth coverage usually means spreading light from multiple directions. Instead of relying on a few ultra-powerful fixtures, designers often use a higher number of luminaires with overlapping beams. This approach softens shadows, reduces harsh contrasts, and helps the field look evenly lit from corner to corner. The aim is to make every part of the playing area feel predictable, no matter where the action moves.
Energy efficiency and operational cost control
Energy use is always part of the discussion, especially for large domes that run lighting systems several thousand hours a year. It’s not unusual for a multi-sport dome to operate lights for 3000 to 5000 hours annually, depending on how busy the schedule is. With hundreds of fixtures installed, small efficiency gains quickly turn into big savings.
Upgrading from older metal halide or fluorescent systems to LED lighting can reduce energy consumption by 40 to 60 percent. On top of that, LEDs switch on instantly, so there’s no need to leave lights running just to avoid long warm-up times. Maintenance costs also drop, since modern sports luminaires are often rated for 50,000 hours or more, meaning fewer lamp changes and less downtime. For facility operators watching long-term budgets, these savings are hard to ignore.
Flexibility for multi-use spaces
Flexibility has become one of the most talked-about objectives in recent years. Very few sports domes serve only one purpose anymore. A single venue might host professional matches on weekends, training sessions during the week, school activities in the afternoon, and community events in the evening.
Lighting systems that support multiple scenes make this possible. Being able to dim lights down to 20 or 30 percent output for training or casual use, then ramp up to full output for competitions, saves energy and reduces wear on the fixtures. Advanced control systems also allow operators to zone the lighting, so only the areas in use are fully lit. A lighting setup that adjusts to the schedule, instead of forcing the schedule to adapt, simply makes daily operations smoother.
Long-term reliability and future readiness
Another design objective that often gets overlooked early on is long-term reliability. Sports domes are not easy places to maintain, especially when fixtures are mounted 30 or 40 meters above the floor. Designers aim to minimize future disruptions by choosing robust luminaires, planning sensible layouts, and allowing some headroom for upgrades.
Selection of Lighting Fixtures
Why LED has become the default choice
Choosing lighting fixtures is where design ideas meet real-world constraints like budget, maintenance, and long-term performance. In today’s sports dome projects, LED lighting has pretty much become the standard, replacing older technologies such as metal halide and high-pressure sodium. The shift isn’t just about energy savings, although cutting power consumption by 40 to 60 percent is a big plus for large venues.
LED fixtures switch on instantly, which sounds simple but makes daily operations much easier. There’s no warm-up time, no waiting around for lights to reach full output, and no need to leave systems running longer than necessary. Lifespan is another major advantage. Many sports-grade LED luminaires are rated between 50,000 and 100,000 hours, which translates to years of use even in busy domes that run lights several thousand hours annually. Fewer lamp changes also mean less time spent dealing with lifts, shutdowns, and safety planning.
Beam angles and optical control
Beam angle selection has a huge impact on how well a sports dome is lit. With mounting heights often exceeding 25 to 40 meters, light needs to be carefully shaped to reach the playing surface efficiently. Narrow beam angles, such as 15° or 20°, are often used for high mounting points, allowing light to travel long distances without spilling into unwanted areas.
Wider beam options, typically in the 40° to 60° range, play a different role. They help fill darker zones, smooth transitions between fixtures, and improve overall uniformity. In practice, most successful dome lighting designs use a combination of narrow and wide beams. Relying on just one beam angle usually leads to either dark patches or excessive glare. Good optical control is less about raw brightness and more about putting light exactly where it’s needed.
Color temperature and visual consistency
Color temperature might sound like a minor detail, but in a large dome it becomes very noticeable. Most sports facilities operate within the 4000K to 5700K range, which feels bright and neutral while supporting alertness and clear visibility. Go too warm and the space can feel dull; go too cool and it can start to feel uncomfortable during long events.
Consistency is just as important as the actual color temperature. In a dome with dozens or even hundreds of fixtures, small variations add up quickly. That’s why reputable manufacturers control color tolerance tightly, often within a 3-step MacAdam ellipse or better. This helps avoid visible patches of slightly different light tones across the field, which can be distracting for players and very obvious on camera during broadcasts.
Durability and environmental resistance
Sports domes can be tough environments for lighting equipment. Heat tends to build up near the roof, dust circulates constantly, and humidity can be an issue, especially in air-supported or multi-climate structures. Fixtures that aren’t designed for these conditions often degrade faster than expected.
That’s why durability is a big part of fixture selection. Sports luminaires with solid thermal management systems maintain output and color stability over time. Ingress protection ratings also matter. Many dome projects specify IP65 or higher, offering protection against dust and water ingress. While these fixtures may cost more upfront, they usually pay for themselves through fewer failures, longer service life, and reduced maintenance disruptions. In high-mounted installations, reliability is worth the investment.
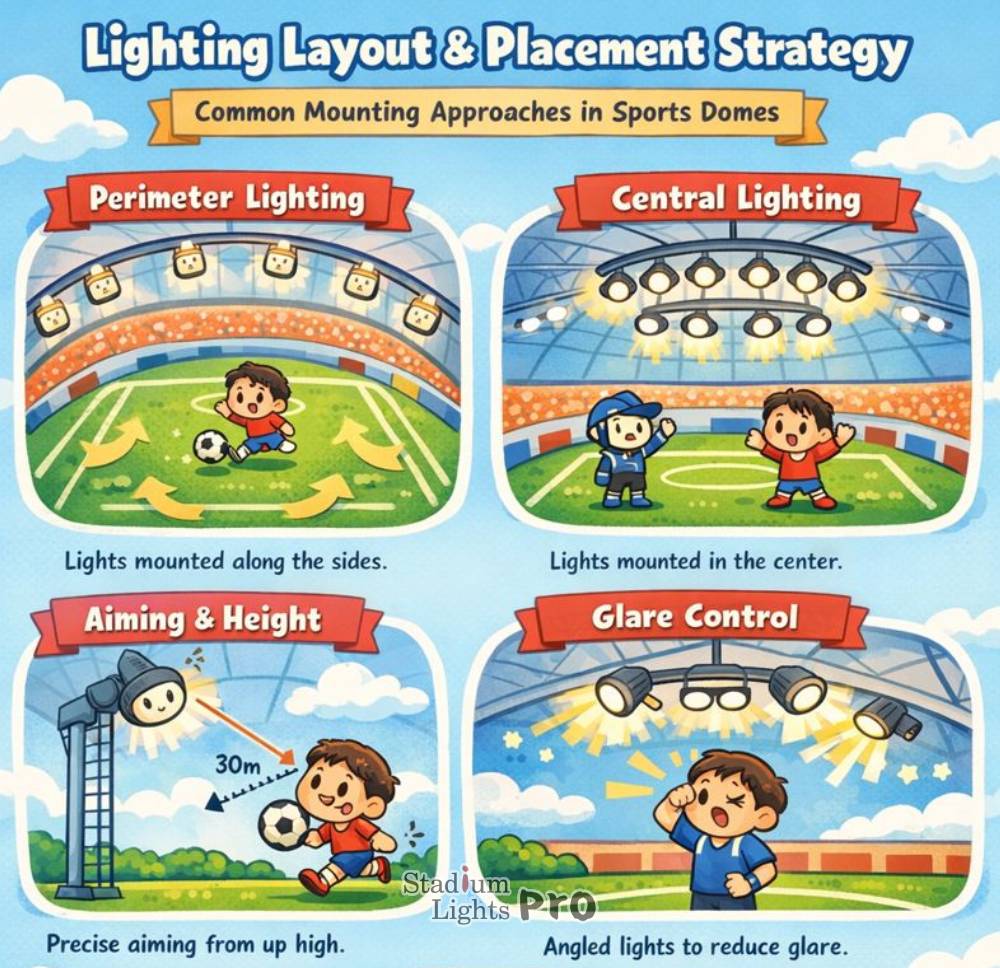
Lighting Layout and Placement Strategy
Common mounting approaches in sports domes
Lighting layout is where all the planning starts to take physical shape. In sports domes, fixtures are commonly mounted along the perimeter, fixed to roof trusses, or suspended from the structure. Each approach has its strengths and limitations.
Perimeter mounting keeps luminaires out of central sightlines, which helps reduce glare for players looking upward. However, relying too heavily on perimeter lighting can make it harder to achieve strong vertical illuminance, especially toward the center of the field. Central or more evenly distributed layouts usually provide better overall coverage, but they require careful aiming to avoid direct glare and unwanted reflections.
Mounting height and aiming precision
Mounting height has a direct effect on spacing and aiming accuracy. Once fixtures are installed 30 meters or higher, even a small adjustment in tilt angle can shift the beam several meters on the playing surface. That’s why designers pay close attention to aiming angles and use detailed mounting grids during installation.
Precise aiming also helps control spill light and improves uniformity. Instead of flooding the entire dome with light, fixtures are directed to overlap gently across the playing area. This creates smoother transitions between bright and darker zones and helps the field feel visually balanced from every angle.
Managing glare for players and spectators
Glare management is a constant challenge in dome lighting. Players often look upward when tracking balls, and spectators may have wide sightlines that intersect with fixture positions. Placing luminaires outside typical viewing angles reduces direct glare, but layout alone isn’t enough.
Designers often angle fixtures slightly away from the field center and rely on overlapping beams rather than direct aiming. This softens the light and reduces harsh contrasts. A well-planned layout makes the lighting feel present without constantly drawing attention to itself.
Working with roof reflections
The dome roof itself plays a bigger role than many people expect. Materials like fabric membranes or coated metal panels can reflect a significant amount of light. Used carefully, these reflections can boost overall brightness and help reduce shadows. Used poorly, they can wash out contrast and create visual discomfort.
Successful layouts treat the roof as part of the lighting system, not just a surface above it. Designers account for reflectance values during simulations and adjust aiming to balance direct and indirect light. When done right, reflections enhance the space instead of fighting against it, helping the dome feel bright, even, and comfortable throughout.
Simulation and Design Tools
Why simulation has become part of the process
In modern sports dome projects, lighting design rarely moves forward without proper simulation. The scale and complexity of domed structures make it almost impossible to rely on rules of thumb alone. Software platforms like DIALux, AGi32, and Relux allow designers to build a digital version of the dome, complete with accurate geometry, mounting heights, surface reflectance values, and real fixture photometric data.
This kind of virtual testing saves a lot of time and avoids costly surprises later. Instead of finding problems after installation, designers can spot them early, when adjustments are still easy. In large domes where lighting systems can involve hundreds of luminaires and significant investment, simulation helps reduce risk and brings more confidence into decision-making.
Predicting illuminance, uniformity, and glare
One of the main strengths of simulation tools is their ability to predict how light will behave across the entire playing surface. Designers can generate illuminance maps showing average, minimum, and maximum lux levels, often down to a grid of 1 meter by 1 meter. This makes it easier to verify whether targets like 1000 or 1500 lux and uniformity ratios above 0.7 are realistically achievable with a given layout.
Glare analysis is another big advantage. Software can estimate glare risk by analyzing fixture positions, aiming angles, and viewer locations. In domes, where players frequently look upward and roof reflections can amplify brightness, this step is especially valuable. Identifying potential glare zones early allows designers to adjust fixture tilt, spacing, or beam angles before anything is mounted.
Testing layouts and fixture combinations
Simulation tools make it easy to compare different design options side by side. Designers often test multiple layouts, changing fixture quantities, mounting locations, and beam distributions to see how each version performs. For example, replacing a few narrow-beam fixtures with wider optics might slightly reduce peak lux levels but significantly improve uniformity and visual comfort.
This trial-and-error process would be impractical on-site, but in a digital model it can be done quickly. It also helps balance performance with cost. A layout that uses 10 percent fewer fixtures while still meeting lighting targets can lead to meaningful savings without sacrificing quality. Simulation helps find that sweet spot between efficiency and performance.
Broadcast-focused analysis
For domes expected to host televised events, simulation goes a step further. Vertical illuminance toward camera positions is carefully analyzed, often at player height around 1.5 meters above the field. Designers check whether vertical lux levels meet broadcast guidelines, sometimes exceeding 1400 to 2000 lux, depending on the level of competition.
Camera angles, positions, and even slow-motion replay requirements can be factored into the model. This level of detail helps avoid last-minute upgrades or temporary lighting additions when a venue suddenly steps onto the broadcast stage.
Visual renderings and stakeholder communication
Numbers are useful, but not everyone speaks the language of lux and uniformity ratios. That’s where visual renderings come in. Simulation software can produce realistic images showing how the dome will look when fully lit, including brightness gradients and shadow patterns.
These visuals help facility owners, architects, and operators understand what the lighting will feel like during actual use. Seeing the space rendered under match conditions often makes discussions smoother and decisions faster. When everyone can picture the result, confidence in the design naturally increases.
Supporting experience with data
Simulation doesn’t replace hands-on experience or good judgment. Lighting designers still rely on practical knowledge, lessons from past projects, and an understanding of how people use the space. What simulation does is support that experience with solid data.
By reducing guesswork and highlighting potential issues early, design tools help create lighting systems that perform as expected from day one. In complex sports domes, that combination of experience and digital analysis makes a noticeable difference in both outcome and peace of mind.
Common Mistakes When Planning the Lighting
Chasing lux numbers without looking at the whole picture
One of the most common mistakes in sports dome lighting is focusing too much on average lux values. On paper, a design might proudly show 1000 lux across the playing surface, yet the space can still feel uncomfortable in real life. That usually happens when uniformity and glare are overlooked. Bright spots next to darker areas or fixtures sitting directly in players’ sightlines can make visibility worse, not better.
Athletes tend to notice these issues right away. Uneven lighting can affect depth perception, while glare can make it harder to track fast-moving balls. Good lighting isn’t just about hitting a target number, it’s about how evenly and comfortably that light is delivered.
Overlooking maintenance and access planning
Maintenance often gets pushed aside during the design phase, especially when the focus is on performance and appearance. In a sports dome, fixtures are commonly mounted 30 meters or more above the floor. If access methods aren’t planned early, routine maintenance can turn into a major operation involving special lifts, scaffolding, or even temporary closures.
Grouping fixtures logically, planning access points, and considering long-life luminaires can significantly reduce future headaches. A system that looks great on opening day but is difficult to maintain can quickly become a burden. Thinking ahead about servicing saves time, money, and disruption over the life of the facility.
Designing only for today’s use
Another frequent pitfall is designing lighting solely around current needs. A dome that’s used mainly for training today may host tournaments, league matches, or broadcast events in the future. If the lighting system has no room to grow, upgrades can become expensive and disruptive.
Lack of scalability often shows up in undersized power infrastructure, limited control capabilities, or fixtures that are already running at full output. Designing with extra capacity, flexible controls, and compatible components helps protect the investment. A little foresight during design can prevent full-scale replacements just a few years down the line.
Relying too much on daylight alone
Daylight can be a great asset in sports domes, especially those with translucent roofs or side panels. However, relying on natural light without proper controls often causes problems. Sunlight changes throughout the day, shifts with the seasons, and behaves differently depending on weather conditions.
Without daylight sensors and dimming controls, artificial lighting may clash with incoming sunlight. This can lead to uneven brightness, glare near openings, and unnecessary energy use when lights stay at full output during bright conditions. Integrating daylight-responsive controls allows artificial lighting to work alongside natural light instead of competing with it.
Skipping proper simulation and testing
Some projects move forward without fully testing the lighting design through simulation or mock-ups. This usually happens due to time pressure or budget concerns, but it often leads to surprises after installation. Issues like glare, shadowing, or poor vertical illuminance are much harder to fix once fixtures are already in place.
Using lighting simulation tools during the planning stage helps catch these problems early. It allows designers to fine-tune layouts, aiming angles, and fixture types before committing to installation. Skipping this step may save time upfront, but it often costs more in the long run.
A Thoughtful Way Forward
Sports dome lighting design sits at the intersection of engineering, architecture, and human experience. When done well, it fades into the background and lets athletes, spectators, and events take center stage. When done poorly, it becomes a constant source of complaints and added costs.
A balanced approach considers the unique dome environment, follows established standards, sets clear design goals, and uses the right mix of fixtures, layouts, and simulations. Numbers matter, but so does how the space feels when the lights come on for a real game.
If you’re planning a new sports dome or upgrading an existing one, working with a team that understands both the technical side and real-world usage can make the process smoother and more rewarding. Feel free to reach out to us for lighting design consultations, simulations, or system upgrades tailored to your dome’s needs. We’re always happy to talk through ideas and help turn them into practical, well-lit spaces.