When a golf course is alive at night—whether it’s driving range hours, twilight rounds, or nighttime events—lighting makes all the difference. But you can’t just throw up poles every which way and hope for good results. If the lights are too far apart, you’ll get dark patches. Too close, and glare or over-illumination becomes a nuisance. So what is the right spacing between golf course lights? In this piece, I explore the advantages of carefully considering spacing, common spacing practices across different golf-area zones (course, range, parking, paths), and a few practical pointers when placing light poles.
Why Think Carefully About Light Spacing?
Getting your spacing wrong can lead to a range of headaches: uneven lighting, excessive energy use, visual discomfort, light trespass, or safety lapses. On the flip side, good spacing helps balance performance and cost, leads to more comfortable play, and reduces complaints from neighbors or players.
A well-designed lighting scheme ensures that golfers see the ball clearly, shadows are minimized, and adjacent areas—fairways, greens, tees—are evenly lit without crazy hot spots. It also ensures the lights don’t bleed into residential properties, roads, or resort buildings nearby.
When layout and spacing are properly done, you avoid unnecessary poles, lower capital cost, and potentially lower energy and maintenance costs in the long run. Also, a thoughtfully spaced system is far more forgiving in terms of aesthetics and minimizing glare or light pollution.
Typical Spacing in Different Zones
Lighting design on a golf facility isn’t one-size-fits-all. Different areas demand different light levels, pole heights, and beam spreads to get things right. What works for a driving range will feel totally off for a cart path or a parking lot. Let’s walk through each zone and look at the usual spacing numbers, along with why they work that way.
| Zone | Typical Pole Height (ft) | Spacing (ft) | Light Level (lux) |
|---|---|---|---|
| Golf Course – Fairways | 30–40 | 70–120 | 100–200 |
| Golf Course – Greens & Tees | 30–40 | 50–80 | 200–300 |
| Driving Range | 30–60 | 60–100 | 100–200 |
| Parking Lot | 20–25 | 30–50 | 10–20 |
| Pathways & Cart Paths | 12–18 | 24–45 | 5–10 |
| Transition Zones | 20–30 | 30–50 | 50–80 |
Golf Course – Fairways, Greens, and Tees
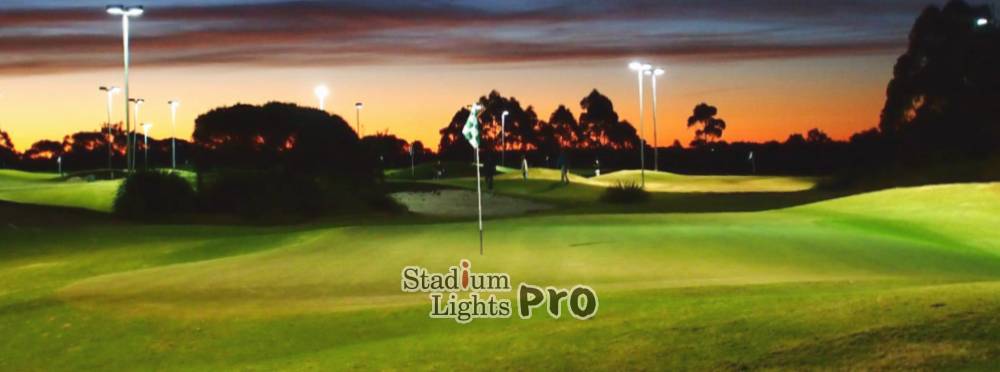
On the main course, you’ve got wide fairways, rolling terrain, and the need to keep shadows to a minimum. That’s where spacing can get tricky. Many designers use pole spacings between 70 and 120 feet (about 20–36 meters), depending on the mounting height and lumen output of each fixture.
Here’s the thing: if you place poles roughly 30 meters apart (about 98 feet), you can usually get good light overlap so you don’t end up with dark “holes” between beams. If you try to stretch it to 40–50 meters (131–164 feet), you’ll need extremely powerful fixtures—think over 20,000 lumens per light—plus super-precise aiming to avoid glare bombs near the poles themselves.
Pole height changes everything. Taller poles, like 40-foot mounts instead of 30-foot ones, let you widen spacing because the beam spreads out more before it hits the ground. But go too high, and you’ll need narrow beam optics, maybe 20–30° cutoff angles, to keep the light from spilling into places it shouldn’t.
On greens and tees, things tighten up. Players want higher lux levels—around 200–300 lux is common—so lights usually sit closer together. Spacing here might shrink to 50–80 feet (15–24 meters), or even closer if the greens are small or the terrain uneven. Too few poles, and you risk hard shadows right where precision putting matters most.
Another headache? Costs. Spacing too close means more poles, more trenching for cables, and bigger electrical bills. So, it’s always a balancing act: good uniformity ratios (ideally 2:1 or better) without going broke on infrastructure.
Driving Range – Long and Narrow Lighting Challenges
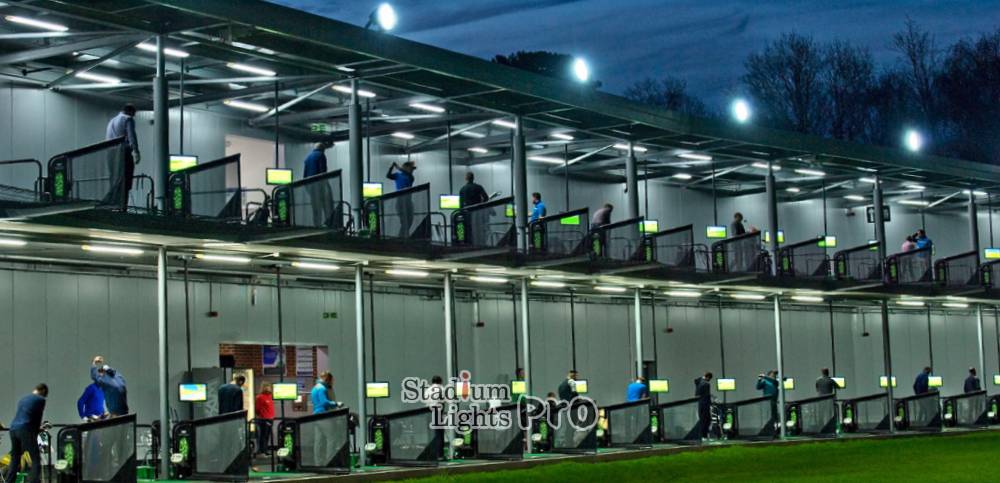
Driving ranges are a different beast. They’re usually long rectangles, often 250–400 yards in length, so the lighting runs mostly along the sides or behind the tee line. Typical pole spacing is around 60 to 100 feet (18–30 meters), depending on how tall the poles are and how powerful the lights are.
Let’s say your poles are 30 feet tall with a beam spread of 40–50°. Spacing them at 80 feet usually gives you decent uniformity, maybe a 3:1 uniformity ratio if you’ve got enough overlap. Stretch it to 100 feet and you might save money on poles, but players could start noticing dark gaps where balls disappear mid-flight.
For ranges longer than 300 yards, the far end often needs extra lighting or taller poles, sometimes 50–60 feet high, so the last 50 yards don’t fade into total darkness. Side lighting on both edges helps too, cutting down on shadows caused by nets or the tee line roof.
One thing players always comment on? Glare. If poles are too close or the beam aiming is sloppy, balls can disappear in the glare near the fixtures. So spacing plus proper aiming angles matters as much as raw brightness.
Parking Lot – Safety and Uniform Illumination
In parking areas, the goal isn’t sports lighting—it’s safety, visibility, and a sense of security. The rule of thumb is usually 1.5 to 2 times the mounting height for spacing. So with 20-foot poles, you’re looking at 30–40 feet apart.
If you go taller, say 25-foot poles, spacing might stretch to 40–50 feet without creating dark spots between cars. That way you keep average light levels around 10–20 lux, which is plenty for pedestrians and drivers to see clearly.
Near entrances or pedestrian crossings, spacing often shrinks because uniform vertical illumination—basically how well people’s faces or obstacles show up—is just as important as lighting the asphalt itself.
Pathways, Walkways, and Cart Paths
Paths and walkways need smooth, comfortable lighting but nothing blinding. Nobody wants a runway-style glare when walking or driving a cart. Here, designers often use the 2 to 2.5 times the mounting height rule again. So if you have 12-foot poles, spacing might be 24–30 feet apart.
Raise the poles to 18 feet, and you can push spacing to 36–45 feet, though you’ll need to watch for terrain changes. Hills or tree lines can block light, leaving some sections darker than others even if the math says spacing works on paper.
Average light levels here might be 5–10 lux—enough so people see where they’re going without feeling like they’re under a spotlight.
Transition Zones Between Areas
Going from the course to the parking lot or from the driving range to a walkway can feel jarring if lighting changes too suddenly. That’s why transition zones often use buffer poles or slightly overlapping beams to smooth out the shift from bright to dim.
For example, if the driving range is lit at 150 lux and the parking lot at 15 lux, designers might create a 50–80 lux “middle zone” where people leave the course but aren’t thrown straight into near-darkness. Spacing in these zones depends on the lux gradient you want, but 30–50 foot spacing with medium beam angles usually does the trick.
Without these overlaps, you end up with bright spots followed by pitch-black stretches—super disorienting for golfers walking off the course at night.
What to Watch Out for When Placing Light Poles
Getting the spacing right is only half the story. Where you actually put each pole—and how the lights are aimed—can make or break the entire setup. Even a perfectly spaced layout can look terrible if poles are placed in the wrong spots, aimed too high, or spill light into places it doesn’t belong.
Keep Light Away from Resorts, Homes, and Roads
Nothing irritates neighbors faster than a golf course light blasting through their bedroom window at 10 p.m. It’s the same for resort villas or public roads nearby—stray light isn’t just annoying; it can cause real safety issues for drivers and even violate local lighting codes in some places.
That’s why designers often map out boundary offsets before the first pole goes in. For example, if the property edge is 50 feet away, you might set the nearest pole at least 30–40 feet inside the boundary line and aim the beam inward at an angle less than 60° so it doesn’t cross property limits.
Adding cutoff optics or visor shields to fixtures helps, too, because they limit the light spread past a certain point. Sometimes, even a 5–10° downward tilt of the luminaire can keep light safely inside the fairway while improving vertical illuminance where players actually need it.
Avoid the “Too Bright, Too Dim” Problem
Another big headache? Light levels that swing wildly from bright to dark. If one area hits 300 lux while another drops below 50 lux, players will feel the difference immediately. Golfers tracking a ball in flight need consistent brightness so their eyes don’t have to constantly adjust.
The usual goal is a max-to-min uniformity ratio around 2:1 or 3:1. Anything above that, and you start getting “hot spots” near poles and gloomy patches farther away. In real terms, if your average is 150 lux, your brightest area shouldn’t exceed 300 lux, and your darkest shouldn’t fall below 100 lux.
Night testing is key here. Designers often bring in temporary light towers during construction to simulate final lighting levels, then tweak aiming angles or dimming controls until the field feels comfortable to play on.
Factor in Terrain, Trees, and Sight Lines
Golf courses aren’t flat stadium fields—they’re full of slopes, bunkers, and trees that can all mess with your lighting plan. A pole placed behind a 10-foot hill might leave a shadowed valley right in front of a green.
Trees are another challenge. A single oak on the fairway edge can block 30–40% of the beam if the pole is placed directly behind it. That’s why some designers use top-down mapping software or even drones at night to check how obstacles affect the light footprint before finalizing pole locations.
And then there’s glare. If players constantly have to look toward exposed fixtures when lining up shots, it ruins the experience. That’s why poles are often placed outside common sight lines—the imaginary cones where players look most often—so the fixtures stay out of direct view.
Plan for Maintenance and Future Upgrades
Lighting systems aren’t “set it and forget it.” Fixtures burn out, storms knock down poles, and LED tech keeps getting better every few years. If you pack poles into cramped corners with no access road, replacing a driver module or re-aiming a fixture becomes a nightmare.
Many facilities now leave at least 10–15 feet of service clearance around each pole and avoid placing them right next to water hazards or dense trees. This way, maintenance crews can bring in a lift truck or even swap fixtures without tearing up the course.
Future-proofing matters, too. Let’s say you start with 30,000-lumen LEDs today but upgrade to 50,000-lumen models in five years. If your original spacing was too tight, the new lights might overlap too much and blow past acceptable brightness levels. A little extra breathing room now can save headaches later.
Get the Aiming, Overlap, and Edge Control Right
Every fixture has a beam angle—20°, 30°, 45°, whatever—that determines how wide the light spreads. The math is pretty simple: the higher the pole, the bigger the footprint for the same angle. A 30° beam from a 40-foot pole might cover a 50–60 foot radius, so poles can be 90–100 feet apart with some overlap.
Too little overlap, and you get dark seams between light cones. Too much, and you waste energy while creating hot spots near the poles. The sweet spot is usually 10–20% beam overlap at ground level.
Edge areas need extra care. If the last pole’s beam spills 20 feet beyond the fairway onto someone’s backyard, you’ve got a problem. Designers often narrow the edge pole beam angles or cut intensity by 20–30% so the light footprint fades out smoothly before reaching the property line.
Key Takeaways
Getting the spacing right for golf course lighting isn’t a trivial puzzle—but it’s one worth solving. By giving thought to spacing combined with fixture height and beam optics, you can create a system that delivers even, comfortable illumination without glare, overshoot, or wasted energy.
When laying out poles, be mindful of nearby structures and roads, avoid shining light where it doesn’t belong, and pay attention to terrain effects and maintenance access. As technology improves, designing with flexibility will help you adapt later.
A well-spaced, well-aimed lighting scheme makes nighttime golfing a pleasure—for players, for neighbors, and for operations.