With LED sports lighting becoming increasingly popular, many facility owners are now looking to replace traditional metal halide floodlights with more efficient alternatives. However, choosing a few high-wattage LED lights and installing them around the field is rarely enough to achieve a professional result. Fixture quantity, lumen output, beam angles, mounting height, pole positions, lighting uniformity, and glare control all need to work together.
So, how many LED lights does an American football field actually need? Is a 500W, 1000W, or 1500W floodlight a better choice? Should the field use four, six, or eight lighting poles? And how much should a complete installation cost?
Let’s go through the design process, from field dimensions and illumination requirements to pole layouts, fixture selection, installation costs, and energy savings. Whether you’re planning a new high school football field or upgrading an existing stadium, understanding these details will make it much easier to choose a lighting system that fits both your facility and your budget.
Understanding American Football Field Dimensions and Lighting Areas
Before selecting LED floodlights or deciding where to install lighting poles, it’s worth starting with the field itself. The size of the playing surface determines the area that needs illumination, while the surrounding facilities influence where poles can be positioned and how the lights should be aimed.
Standard American Football Field Size
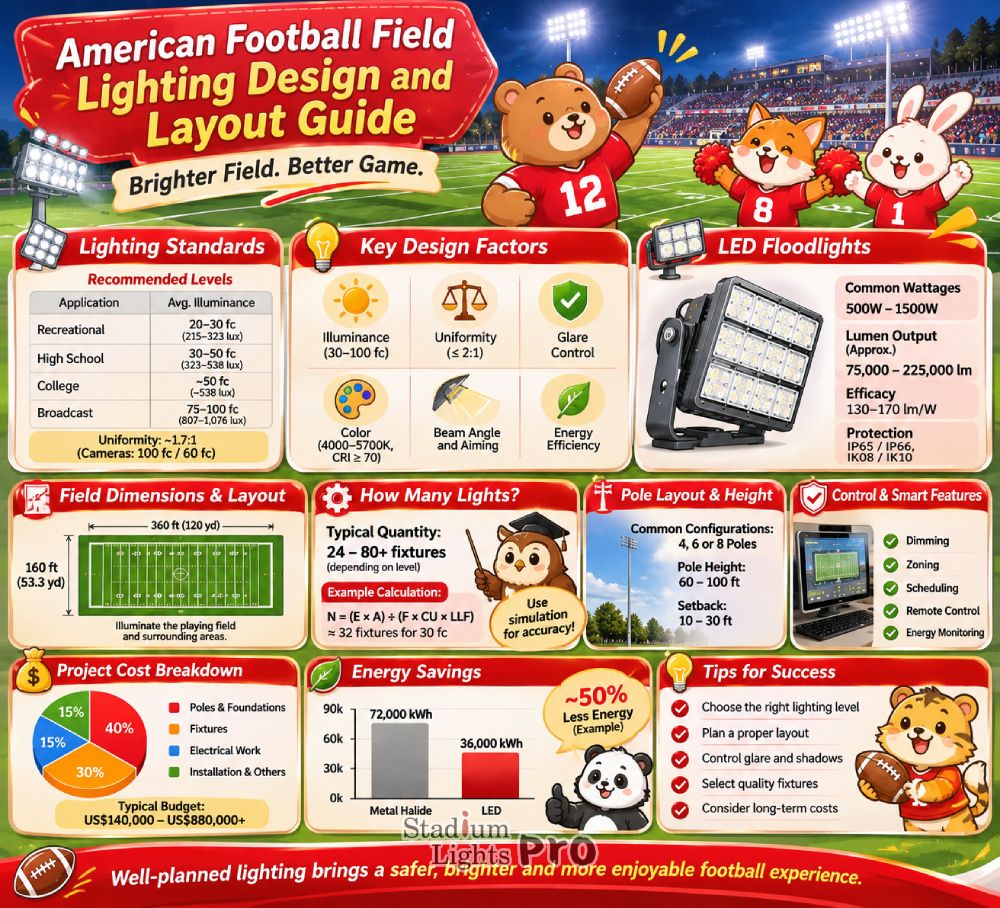
A standard American football field measures 100 yards between the two goal lines, with an additional 10-yard end zone at each end. The total playing length is therefore 120 yards, or 360 feet. The field is 53⅓ yards wide, equivalent to approximately 160 feet.
This gives a total playing area of approximately 57,600 square feet, or 5,351 square meters.
The dimensions are generally consistent across high school, college, and professional football. However, the overall site area can vary considerably because some facilities include additional runoff space, team zones, spectator seating, and surrounding walkways.
For lighting designers, the distinction between the playing surface and the entire illuminated area matters. A project may require the main playing field to meet one illumination target while the sidelines, team benches, spectator areas, and access routes have different requirements.
Which Areas Need to Be Illuminated?
The main playing surface is the primary lighting zone. It includes the central field, both end zones, and the areas around the yard lines. Light needs to reach these areas evenly so players can track passes, identify other players, and follow the action without sudden changes in brightness.
The sidelines also deserve attention. Coaches, substitutes, medical staff, referees, and other personnel need sufficient visibility while games are underway. If the lighting stops abruptly at the field boundary, the result can be an uncomfortable contrast between the bright playing surface and the darker surrounding areas.
Spectator seating is another consideration. Stands, stairways, aisles, entrances, and walkways need suitable lighting for people arriving, watching the game, and leaving the venue. These areas may use separate lighting systems rather than relying entirely on the main sports floodlights.
Some larger stadium projects also include parking areas, exterior access roads, ticket entrances, and surrounding landscaping. These should be treated as separate lighting zones because their requirements are not the same as those of the playing surface.
Why Field Dimensions Affect the Lighting Layout
Although the standard field dimensions are relatively straightforward, the surrounding site can make every project different. A high school field with open space around all four sides offers more flexibility than a stadium surrounded by grandstands, buildings, or residential properties.
For example, a field measuring 360 × 160 feet has a playing area of 57,600 square feet. If the lighting design also covers a 15-foot strip around the entire field, the illuminated footprint becomes approximately 390 × 190 feet, or 74,100 square feet. That’s almost 29% more area than the playing surface alone.
This doesn’t mean the surrounding strip needs the same foot-candle level as the playing field. It simply shows why the lighting designer needs to define the project boundary before calculating the required fixtures.
American Football Field Lighting Requirements and Recommended Standards
Lighting requirements depend on the level of competition, whether games are televised, and which standards or governing-body specifications apply. A recreational training field does not need the same lighting performance as a university stadium hosting nationally televised games.
The first step is to identify the intended use of the facility. Once that is clear, the designer can establish appropriate targets for illuminance, uniformity, vertical lighting, glare, and color quality.
What Is the Recommended Lux or Foot-Candle Level?
Illuminance describes how much light reaches a surface. It is usually measured in lux or foot-candles. One foot-candle equals approximately 10.764 lux, so 30 foot-candles is about 323 lux, while 50 foot-candles is approximately 538 lux.
For American football, the required lighting level can vary significantly between recreational play, school competitions, college games, and broadcast events.
As a starting point for project discussions, the following figures provide useful planning ranges. They should not be treated as universal compliance requirements because the final target needs to be checked against the current applicable IES recommendations, competition specifications, and any broadcaster requirements.
| Football field application | Preliminary average horizontal illuminance | Approximate lux |
|---|---|---|
| Recreational training | 20–30 fc | 215–323 lux |
| Community and school competition | 30–50 fc | 323–538 lux |
| College competition without broadcast | Around 50 fc or project-specific | Around 538 lux |
| Regional television broadcast | Around 75 fc or higher, depending on specifications | Around 807 lux |
| National television broadcast | Around 100 fc or project-specific | Around 1,076 lux |
These figures are useful for early budgeting, but a designer should not simply select a value from the table and assume the field will meet every requirement.
The Illuminating Engineering Society’s ANSI/IES RP-6-24, published in 2025, provides guidance for sports and recreational lighting, including outdoor sports applications. For televised college football, NCAA lighting guidance provides additional performance information.
For example, NCAA national broadcast guidance specifies approximately 100 horizontal foot-candles, horizontal uniformity of 1.7:1, and vertical illuminance targets of 100 foot-candles toward the main high camera and 60 foot-candles toward the end-zone camera. These are broadcast-specific design targets rather than requirements for every American football field.
Horizontal Illuminance vs. Vertical Illuminance
Horizontal illuminance measures the light falling onto a horizontal surface, such as the football field. It is the measurement most people think of when discussing how bright a playing surface is.
For example, a lighting designer may specify an average horizontal illuminance of 50 foot-candles across the field. This means the lighting system should deliver an average of approximately 50 foot-candles across the defined measurement grid, rather than producing that value at just one convenient location.
Vertical illuminance measures light falling onto a vertical plane. It becomes particularly relevant when a football game is being recorded or broadcast.
Think about a player catching a pass. The camera needs to capture the player’s face, uniform, and the ball clearly, not just show a brightly illuminated patch of grass. If the field has plenty of horizontal illumination but insufficient vertical illumination, the television picture may still look flat or dark.
For broadcast facilities, designers therefore assess vertical illuminance from the expected camera positions. Measurements may be taken toward the main sideline camera, end-zone cameras, and other planned camera locations.
A field designed for local recreational games may not need an advanced broadcast lighting system. However, if a university expects to host televised games in the future, planning for vertical illuminance from the beginning can help avoid expensive modifications later.
Lighting Uniformity – Avoiding Bright and Dark Patches
Average illuminance tells only part of the story. A field can have an impressive average foot-candle reading while still containing noticeably dark areas.
Imagine a field where the central 50-yard line receives 80 foot-candles, but some areas near the end zones receive only 20 foot-candles. The overall average might look acceptable, yet players would experience significant changes in brightness as they move across the field.
This is why lighting uniformity is measured.
Two commonly used metrics are minimum-to-average uniformity and maximum-to-minimum uniformity. Minimum-to-average uniformity is calculated by dividing the lowest measured illuminance by the average. Maximum-to-minimum uniformity compares the brightest point with the darkest point.
Some specifications express the latter as a ratio such as 2:1. In practical terms, a lower ratio generally indicates a more even distribution of light.
The NCAA’s published football lighting guidance uses different uniformity targets depending on the competition and broadcast category. National broadcast guidance, for example, specifies a horizontal uniformity ratio of approximately 1.7:1.
Designers should always state which uniformity metric is being used. A figure without its calculation method can be misleading.
Color Temperature and Color Rendering
Color temperature affects how white light appears. It is measured in Kelvin (K). A lower value produces a warmer appearance, while a higher value produces a cooler, more neutral appearance.
For outdoor football lighting, 4000K and 5000K are common options. A 4000K system gives a relatively neutral white appearance, while 5000K provides a cooler look that many facilities prefer for nighttime sports.
For televised sports, the required color characteristics should also be discussed with the broadcast team. Some broadcast specifications call for color temperatures in the 5000K–6000K range.
Color rendering index, or CRI, describes how accurately a light source reveals colors compared with a reference source. A CRI of 70 or above is commonly found in outdoor sports lighting products, while higher values may be preferred for certain broadcast applications.
A higher CRI is not automatically a sign of a better complete lighting system. Buyers should consider color quality alongside fixture efficacy, optical performance, glare, and camera requirements.
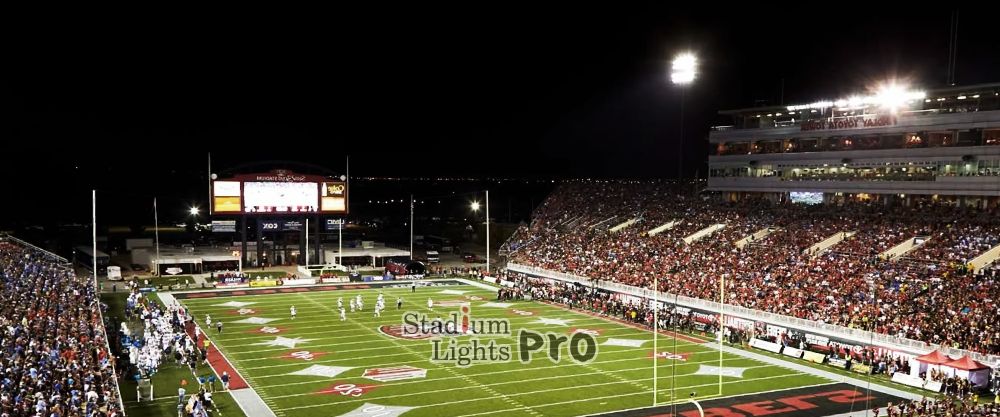
American Football Field Lighting Pole Layout and Placement
Pole layout is one of the biggest factors affecting the final lighting result. Even high-performance LED floodlights can produce uneven illumination if they are installed in unsuitable positions.
The designer needs to consider the field dimensions, mounting height, pole setback, surrounding structures, spectator sightlines, and the direction from which light reaches the playing surface.
Four-Pole Layout
A four-pole configuration generally places one lighting structure near each corner of the playing area. Each pole carries multiple LED floodlights aimed toward different sections of the field.
This arrangement is often considered for smaller recreational facilities and some school-level projects.
Its main advantage is that fewer poles may reduce foundation work, electrical connections, and maintenance access points. The layout can also be relatively straightforward when the site has open space around the field.
However, four-pole systems need careful aiming. Because there are fewer lighting positions, the designer must make sure the central field, end zones, and sidelines receive suitable coverage.
Depending on the required illuminance and uniformity, a four-pole arrangement may not be the most suitable choice for higher-level competition.
Six-Pole Layout
A six-pole configuration provides more lighting positions and additional flexibility. A common arrangement places three poles along each long side of the field, although the actual positions depend on the stadium geometry.
The additional positions can help distribute light more evenly, particularly across the central field and end zones.
Six-pole layouts are frequently considered for school and college facilities where a balance between lighting performance and infrastructure cost is required.
Another advantage is that designers can divide the lighting load across more positions. This may allow them to use different fixture outputs and aiming directions rather than concentrating all the light at four locations.
The disadvantage is the additional cost of poles, foundations, wiring, and installation work.
Eight-Pole Layout
An eight-pole configuration provides even more flexibility. It may use four lighting positions along each long side, or another arrangement determined by the field’s geometry.
This type of layout can be useful for facilities with higher illumination targets, larger spectator areas, or more demanding uniformity requirements.
However, eight poles do not automatically guarantee better lighting. Their locations and aiming angles still need to be optimized. A poorly designed eight-pole system can perform worse than a properly engineered six-pole arrangement.
The best configuration should come from photometric calculations rather than the assumption that a larger pole count always produces a better result.
Comparing Different Pole Arrangements
| Layout | Typical application | Main advantage | Main consideration |
|---|---|---|---|
| 4 poles | Recreational and selected school fields | Fewer foundations | Requires careful aiming |
| 6 poles | School and college facilities | Flexible light distribution | Higher infrastructure cost |
| 8 poles | Higher-output and complex projects | More aiming positions | More installation work |
| Roof-mounted | Stadium facilities | Integrated stadium lighting | Structural and access requirements |
These are common design concepts, not fixed rules. Actual pole locations may differ because of grandstands, property boundaries, existing structures, and local regulations.
Recommended Light Pole Height
Pole height affects the distance light travels, the beam angle needed to cover the field, and the visibility of the light source to players and spectators.
Common planning options include 60-foot, 70-foot, 80-foot, 90-foot, and 100-foot poles. Smaller facilities may use shorter mounting heights, while larger stadiums often require taller structures.
A 60-foot pole may be practical for certain recreational projects, but the designer needs to check whether it can achieve acceptable uniformity without producing excessive glare.
An 80-foot pole provides a higher mounting position and may allow floodlights to cover a larger area. However, structural costs and foundation requirements can increase as pole height rises.
For high-output stadium lighting, 90-foot or 100-foot poles may be considered, especially when the site has suitable setbacks and structural conditions.
The final height should be selected through photometric analysis and structural engineering. Wind loads, pole deflection, soil conditions, fixture weight, and maintenance access all need to be considered.
How Far Should Lighting Poles Be From the Football Field?
Pole setback is the distance between the pole base and the edge of the playing area.
There is no single setback distance that applies to every field. A designer may explore positions 10–30 feet outside the playing boundary where the site permits, but the required clearance depends on the applicable safety rules, field surroundings, spectator seating, and structural design.
If poles are placed too close to the sidelines, they may create safety concerns and interfere with field operations. If they are placed too far away, the fixtures may need higher output or more concentrated beam distributions to deliver sufficient light.
The position of the poles also affects glare. A pole located within a player’s main viewing direction may create an uncomfortable light source when the player looks toward a high pass.
For this reason, pole setback and fixture aiming should be evaluated together rather than treated as separate decisions.
What Should a Professional Pole Layout Drawing Include?
A useful lighting layout drawing should show the field dimensions, pole coordinates, mounting heights, and the number of floodlights installed at each position.
It should also identify fixture wattage, lumen output, optical distribution, beam angles, and aiming directions.
The photometric report should provide average, minimum, and maximum horizontal illuminance, uniformity ratios, and any required vertical illuminance measurements.
For broadcast projects, the design should also show the relevant camera positions and vertical measurement planes.
These details make it easier for the buyer to compare proposals from different suppliers. Instead of comparing only the total number of lights, the buyer can assess whether each proposed system is designed to achieve the same performance.
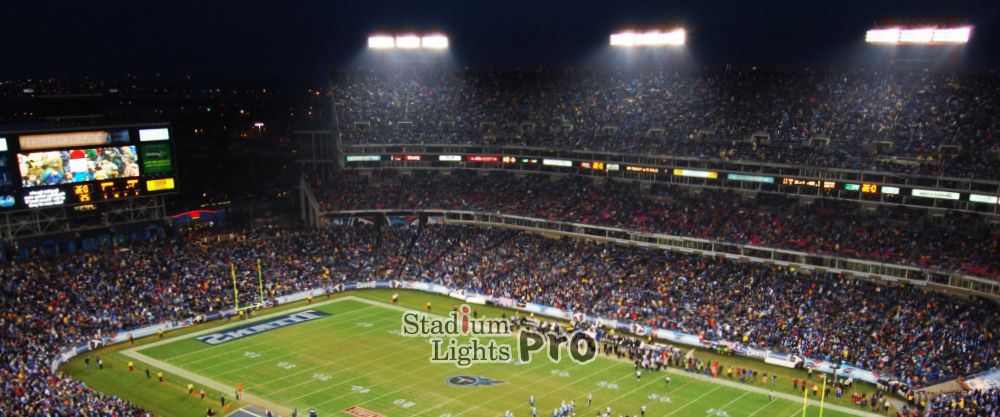
Controlling Glare in American Football Stadium Lighting
A football field can have plenty of light and still be uncomfortable to play on. One common reason is glare. It occurs when players, referees, or spectators look toward an excessively bright light source or experience uncomfortable brightness differences within their field of vision.
Glare deserves particular attention in American football because players regularly look upward to follow passes. A quarterback may need to track a receiver running downfield, while a defensive player may be looking toward a high ball against the night sky. If a floodlight sits directly within that viewing direction, it can make the ball harder to see.
What Causes Glare in Outdoor Sports Lighting?
Poor fixture aiming is one of the most common causes. When a floodlight points too close to a player’s normal viewing direction, its bright LED source can become uncomfortable.
Incorrect mounting height can also contribute to the problem. If fixtures are installed too low, their light sources may be more visible from the playing surface. On the other hand, simply increasing pole height does not solve every glare issue because the aiming angle and optical distribution still matter.
Excessive fixture brightness, unsuitable beam angles, and poor pole positioning can make matters worse. A lighting system with many high-output fixtures may look impressive from a distance, but players could experience discomfort if the beams are not properly controlled.
How Does Glare Affect Players and Spectators?
For players, glare can interfere with tracking the ball, especially during high passes and long kicks. It may also make it harder to identify other players when moving between brightly illuminated and darker areas.
Referees can experience similar problems when looking across the field or following fast-moving plays. Spectators may find certain seating positions uncomfortable if they have a direct view of unshielded floodlights.
Television cameras can also be affected by poorly controlled light sources. Excessive brightness, reflections, and unsuitable aiming directions may reduce image quality or create distracting visual effects.
Practical Ways to Reduce Football Field Lighting Glare
The most effective approach is to begin with a suitable lighting layout. Designers should position poles and select mounting heights that allow the floodlights to illuminate the playing surface without unnecessarily directing intense light toward players or spectators.
Precision sports optics can help control where the light goes. Narrow, medium, and asymmetric beam distributions allow engineers to direct different portions of the field from different lighting positions.
Anti-glare shields and backlight accessories may also be useful where surrounding conditions require them. However, accessories should be selected carefully because adding a shield can reduce useful output or change the beam distribution.
Fixture aiming is another part of the process. A professional lighting simulation should assess the direction of each floodlight and identify areas where glare may be a concern. After installation, the fixtures should be aimed and checked on site rather than simply left at their factory settings.
Reducing Light Pollution and Light Spill
Not all light should stay within the stadium, but unnecessary spill should be minimized. This is particularly relevant when a football field is located close to residential neighborhoods, roads, schools, or environmentally sensitive areas.
Light trespass occurs when unwanted light reaches nearby properties. Upward light can also contribute to skyglow, making the night sky appear brighter than it should.
Buyers should ask manufacturers about backlight control, shielding options, optical distributions, and compliance with local outdoor lighting regulations.
A well-designed system should direct most of its useful output toward the playing area. More light leaving the stadium does not mean better lighting on the field.
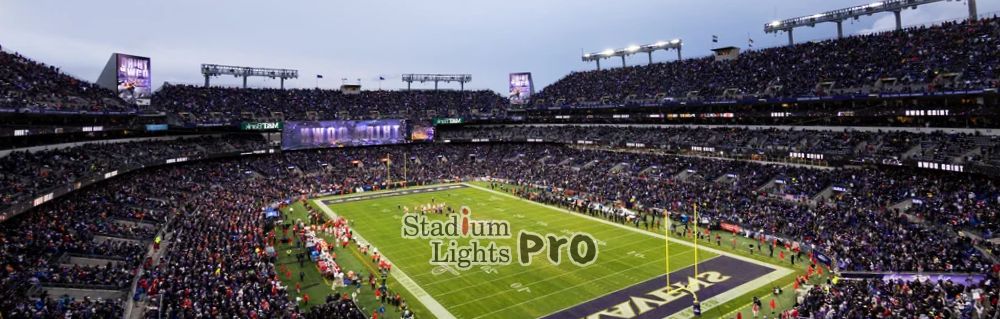
Reducing Shadows and Dark Spots Across the Playing Surface
Shadows are another issue that can make a football field feel poorly illuminated, even when the total fixture wattage is relatively high.
A football game involves constant movement. Players run, jump, turn, and change direction, while the ball travels through the air and across the field. Lighting needs to provide consistent visibility throughout these movements.
Why Do Shadows Occur on Football Fields?
Shadows are created when an object blocks light from reaching a surface. In stadium lighting, they may appear when the light comes mainly from one direction or when structures obstruct part of the playing area.
For example, if most floodlights are installed on one side of the field, players may cast noticeable shadows across the grass. A similar issue can occur near large grandstands, scoreboards, and other structures.
Poor beam distribution can also create dark spots. A narrow beam aimed at the wrong location may produce a bright patch while leaving nearby areas underlit.
How Multiple Lighting Directions Improve Visibility
One practical solution is to distribute light from several positions around the field. When floodlights illuminate the playing surface from different directions, the effect of individual shadows can be reduced.
This does not mean every part of the field needs to be illuminated equally from every direction. Instead, the designer should balance the contribution from different poles to avoid excessive brightness from one side.
For example, a six-pole layout may provide more flexibility than a four-pole layout when the site permits additional installation positions. However, the final decision should depend on the simulation results rather than pole quantity alone.
Achieving Uniform Lighting From End Zone to End Zone
The end zones sometimes receive less attention than the central playing area during early design discussions. This can create problems when fixtures are concentrated near the middle of the field.
A proper photometric plan should include measurement points across the full 120-yard playing length and the entire 53⅓-yard width. The designer should also define whether the surrounding sidelines are included in the calculation area.
A useful way to check uniformity is to divide the field into a measurement grid. For example, a 30-foot grid can provide a practical starting point for reviewing the distribution of light, although the final grid spacing should follow the relevant project specification.
The designer can then compare the average, minimum, and maximum readings to identify areas that need adjustment.
Why Photometric Simulation Helps Prevent Dark Spots
Photometric simulation makes it possible to identify uneven lighting before the poles and floodlights are installed.
The software uses the photometric data of each fixture, the field dimensions, mounting heights, aiming angles, and other design information to estimate the light distribution.
The resulting report can show a false-color illumination map, where different colors represent different illuminance levels. Bright areas, dark areas, and uneven transitions become easier to identify.
This can save considerable time and money. Adjusting a fixture position in a design program is much easier than discovering after installation that several floodlights need to be moved or replaced.
How Much Does American Football Field Lighting Cost?
Project cost is one of the biggest concerns for schools, universities, sports clubs, and stadium owners. Even when two football fields have identical playing dimensions, their lighting budgets can be very different.
A new installation with eight tall poles, new concrete foundations, underground cables, and a large electrical distribution system will cost considerably more than a retrofit that reuses suitable existing infrastructure.
The best way to estimate the budget is to divide the project into several components. This helps buyers understand where the money goes and identify opportunities to reduce costs without compromising the lighting performance.
Average Cost of a New LED Football Field Lighting System
As a broad US market reference, Sports Venue Calculator published a 2026 estimate of approximately US$222,468–US$877,260 for a complete new LED football field lighting installation. Its published range reflects different project sizes and specifications, including municipal, high school, and college facilities.
The same source gives an indicative range of approximately US$142,460–US$343,680 for LED retrofit projects. These figures are useful for early budgeting, but they should not be treated as fixed market prices or supplier quotations.
The actual cost depends on fixture quantities, pole height, foundation requirements, electrical infrastructure, installation conditions, and whether broadcast lighting is required. Professional stadium projects can fall outside these typical ranges because their structural and broadcast requirements are more specialized.
LED Floodlight Purchase Costs
The floodlights are usually one of the most visible parts of the equipment budget. Their prices vary according to wattage, lumen output, optical design, LED components, driver specifications, protection ratings, certifications, and warranty coverage.
For preliminary budgeting, a buyer might investigate the following illustrative supply-price allowances. These are planning assumptions rather than verified market quotations, and actual prices should be obtained from suppliers for the exact product specifications.
| LED floodlight | Illustrative unit price | Example quantity | Estimated fixture subtotal |
|---|---|---|---|
| 500W | US$350–US$650 | 32 | US$11,200–US$20,800 |
| 750W | US$500–US$850 | 40 | US$20,000–US$34,000 |
| 1000W | US$650–US$1,100 | 48 | US$31,200–US$52,800 |
| 1500W | US$950–US$1,600 | 60 | US$57,000–US$96,000 |
These examples are not interchangeable system quotations. A 32-fixture 500W installation and a 60-fixture 1500W installation have very different total output and electrical loads. They should only be compared after their lighting performance has been evaluated.
When requesting a quotation, buyers should ask whether the price includes mounting brackets, aiming accessories, surge protection, control compatibility, and the required photometric documentation.
Light Pole and Foundation Costs
Light poles can represent a substantial portion of the total project budget, particularly when the installation uses structures 70–100 feet tall.
The price depends on pole height, steel grade, wall thickness, shaft design, mounting arrangement, wind loading, corrosion protection, and the weight of the floodlights installed at the top.
For an early budget, a buyer might use a broad planning allowance of US$8,000–US$20,000 per pole for certain conventional sports lighting structures. Larger or more specialized structures can cost considerably more, particularly when structural requirements are demanding.
Foundations are another expense. Their design depends on the soil conditions, pole dimensions, wind loads, and engineering calculations. A preliminary allowance of US$5,000–US$15,000 per foundation may be used for initial budgeting, but actual civil engineering quotations can fall outside this range.
For a six-pole project, these illustrative allowances would produce a combined pole and foundation budget of approximately US$78,000–US$210,000.
The figure should not be treated as a standard price. Some projects have relatively simple foundation conditions, while others require extensive excavation, reinforced concrete, ground improvement, or difficult crane access.
Electrical Infrastructure and Installation Expenses
Electrical infrastructure includes more than the cables running from the distribution cabinet to the floodlights. A complete installation may require distribution panels, circuit breakers, conduits, grounding systems, surge protection, control equipment, and suitable electrical connections at each pole.
For a preliminary project budget, electrical equipment and cabling might be allocated US$15,000–US$50,000, depending on the size of the installation and the distance between the power source and the poles.
Installation labor is another variable. A straightforward project with good site access may be less expensive than a stadium retrofit where work must be coordinated around existing structures and operating schedules.
Crane rental, electrical contractors, concrete crews, lifting equipment, traffic management, and commissioning services can all add to the final bill.
Buyers should also check whether the supplier’s quotation includes installation supervision or only the supply of the LED fixtures.
Professional Lighting Design and Photometric Simulation Costs
A professional lighting design may involve site measurements, fixture selection, photometric calculations, pole positioning, structural coordination, and electrical planning.
Some lighting manufacturers provide a basic DIALux or AGi32 simulation free of charge when customers are considering a substantial equipment order. Other projects may require a separate lighting consultant or engineering fee.
For preliminary budgeting, a smaller sports lighting design might receive an allowance of US$1,500–US$5,000, while more complex stadium projects may require a significantly larger engineering budget.
The buyer should clarify exactly what the design fee includes. A simple image showing bright spots on a field is not the same as a complete photometric report.
A proper report should identify the fixture models, mounting heights, aiming angles, average and minimum illuminance, uniformity, and total connected power. For broadcast facilities, it should also address vertical illuminance from the specified camera positions.
Example Budget for a Six-Pole High School Football Field
Let’s consider a hypothetical high school project using six lighting poles and 48 LED floodlights rated at 1000W each.
The purpose of this example is to show how project costs can be organized. It is not a ready-to-build specification, because the actual fixture quantity and wattage must be confirmed through a lighting design.
| Project component | Illustrative budget |
|---|---|
| 48 LED floodlights | US$43,200 |
| 6 lighting poles | US$72,000 |
| 6 concrete foundations | US$48,000 |
| Electrical distribution and cabling | US$28,000 |
| Installation and crane work | US$24,000 |
| Lighting design and commissioning | US$5,000 |
| Estimated project total | US$220,200 |
This example shows why looking only at the floodlight purchase price can give buyers the wrong impression. The fixtures account for less than one-quarter of the hypothetical project budget, while poles, foundations, electrical infrastructure, and installation make up the larger share.
The figures are illustrative allowances, not current supplier quotes. Taxes, permits, shipping, contingencies, and major site upgrades may also need to be added.
New LED Installation vs. Existing Metal Halide Retrofit
A new football field installation usually involves more construction work because the owner may need to install poles, foundations, cables, and distribution equipment from the beginning.
A retrofit can be more economical if the existing poles, foundations, and electrical infrastructure are still suitable.
For example, a stadium with six structurally sound poles may be able to replace its existing metal halide floodlights with LED fixtures without rebuilding the entire lighting infrastructure.
However, reusing the existing poles should never be assumed to be safe without an engineering inspection. The new LED fixtures may have different weights, wind areas, bracket arrangements, and aiming requirements.
The existing electrical system should also be checked. A retrofit may require new drivers, circuit protection, control equipment, or cable upgrades.
| Cost consideration | New installation | LED retrofit |
|---|---|---|
| New lighting poles | Usually required | May be reusable |
| Concrete foundations | Usually required | May be reusable after inspection |
| Electrical cables | Often new | Existing cables may be reusable |
| LED floodlights | New | New |
| Structural engineering | Required | Required to assess reuse |
| Construction work | Usually more extensive | Often less extensive |
The financial advantage of a retrofit can be considerable, but only when the existing infrastructure is in good condition and suitable for the new lighting design.
How to Reduce the Total Project Cost
The easiest way to reduce project costs is to start with the right lighting target. Specifying a 100-foot-candle system for a facility that only needs a lower competition level can increase equipment, infrastructure, and electricity expenses unnecessarily.
Pole layout optimization is another opportunity. A lighting designer may be able to improve the distribution of light by adjusting the number of poles and the fixture arrangement, rather than simply adding more high-wattage floodlights.
Choosing high-efficiency LED fixtures can reduce long-term electricity expenses. However, the purchase price should be compared with the expected energy and maintenance savings over the system’s operating life.
Reusing existing poles and foundations can also help, provided a qualified engineer confirms that they are suitable.
Finally, buyers should compare complete project quotations rather than individual fixture prices. A supplier offering lower-cost floodlights may not include the same level of engineering support, electrical accessories, or commissioning services.
Electricity Consumption and Long-Term Operating Costs
The initial project budget is only one part of the financial picture. A football field may operate its lighting system for hundreds or even thousands of hours each year, so electricity consumption can become a major ongoing expense.
LED technology can reduce this cost compared with older metal halide systems, but the actual savings depend on the lighting levels, operating hours, fixture efficacy, electricity tariff, and maintenance requirements.
How Much Electricity Does a Football Field Lighting System Use?
Let’s use a simple example with 60 LED floodlights, each rated at 1000W.
The total installed lighting load is:
60 × 1000W = 60,000W
60,000W ÷ 1000 = 60kW
If the system operates for six hours each day, its daily electricity consumption is:
60kW × 6 hours = 360kWh
Assuming 200 operating days per year:
360kWh × 200 days = 72,000kWh annually.
This is the energy consumption at full rated load, before accounting for dimming, standby power, or other operating conditions.
Calculating the Annual Electricity Bill
To estimate the annual electricity cost, multiply the annual energy consumption by the electricity tariff.
For example, assume the football field uses 72,000kWh per year and the facility pays US$0.15 per kWh.
72,000kWh × US$0.15 = US$10,800 per year.
At an electricity rate of US$0.20 per kWh, the same lighting system would cost US$14,400 annually.
The difference is US$3,600 per year, even though the fixtures and operating schedule remain unchanged.
For larger facilities, the electricity tariff can have a considerable effect on the long-term project budget. Buyers should therefore use their actual utility rate instead of relying on a national average.
LED vs. Traditional Metal Halide Lighting
Metal halide floodlights have been widely used in outdoor sports facilities, but LED systems offer several advantages.
One is energy efficiency. Consider a hypothetical comparison between 60 metal halide fixtures rated at 2000W each and 60 LED fixtures rated at 1000W each.
The metal halide system has a connected lamp load of 120kW, while the LED system has a connected load of 60kW.
Assuming both systems operate for six hours per day over 200 days, the annual energy consumption would be:
Metal halide – 120kW × 6 × 200 = 144,000kWh.
LED – 60kW × 6 × 200 = 72,000kWh.
The difference is 72,000kWh per year.
At US$0.15 per kWh, the theoretical annual energy cost reduction would be US$10,800.
This is an illustrative comparison, not a guaranteed one-for-one replacement specification. The two systems must provide comparable maintained lighting performance, including illuminance and uniformity. Actual metal halide input power may also differ from lamp wattage because of ballast losses.
LEDs can also offer better switching flexibility, more predictable control, and reduced relamping requirements. Their actual maintenance savings depend on fixture quality and operating conditions.
Calculating the Payback Period
Payback period is a useful way to estimate how long it takes for the energy and maintenance savings to recover the additional investment.
The basic formula is:
Payback period = Additional investment ÷ Annual net savings
For example, suppose an LED retrofit costs US$180,000 more than a basic alternative after all project costs have been considered. If the LED system saves US$10,800 annually in electricity and an additional US$3,200 in maintenance, its annual net savings would be US$14,000.
The simple payback period would be:
US$180,000 ÷ US$14,000 = approximately 12.9 years.
In a real project, the calculation should also account for energy price changes, replacement costs, financing, taxes, incentives, and the expected service life of the equipment.
Total Cost of Ownership
A lower initial purchase price does not always mean a cheaper lighting system over the long term.
Total cost of ownership includes the original equipment purchase, installation, electricity, maintenance, replacement components, and other expenses during the operating period.
For example, a facility operating 60 LED floodlights for 1,200 hours per year may accumulate 60,000 operating hours over 50 years, although individual fixtures and drivers may require maintenance or replacement well before then.
It is therefore worth comparing supplier warranties, spare-part availability, driver replacement options, and documented lumen maintenance.
A good purchasing decision should consider both the installation budget and the expected costs of running the stadium over the next 10–15 years.
Designing a Football Field Lighting System That Delivers Long-Term Value
A successful American football field lighting project starts with a clear understanding of how the facility will be used. A recreational training ground, a high school stadium, and a televised college venue may share the same playing dimensions, but their lighting requirements and project budgets can be very different.
The most sensible approach is to establish the required illuminance first, then select the LED floodlights, fixture quantities, beam distributions, pole heights, and installation positions around those targets. A professional photometric simulation can help identify glare, shadows, and uneven illumination before construction begins.
It’s also worth looking beyond the initial equipment price. Poles, foundations, electrical infrastructure, installation, electricity consumption, and maintenance all contribute to the real cost of operating a football field lighting system. A well-planned LED installation may require a larger initial investment than a basic solution, but better efficiency and reduced maintenance can make it a worthwhile long-term choice.
For facility owners preparing a new project or upgrading existing metal halide lights, the next step is to obtain a design based on the actual field dimensions and operating requirements. Ask the supplier for a detailed lighting simulation, an itemized quotation in US$, and clear performance specifications. That way, you can compare different proposals on what really matters – consistent field illumination, comfortable visibility, reliable equipment, and a reasonable long-term operating cost.