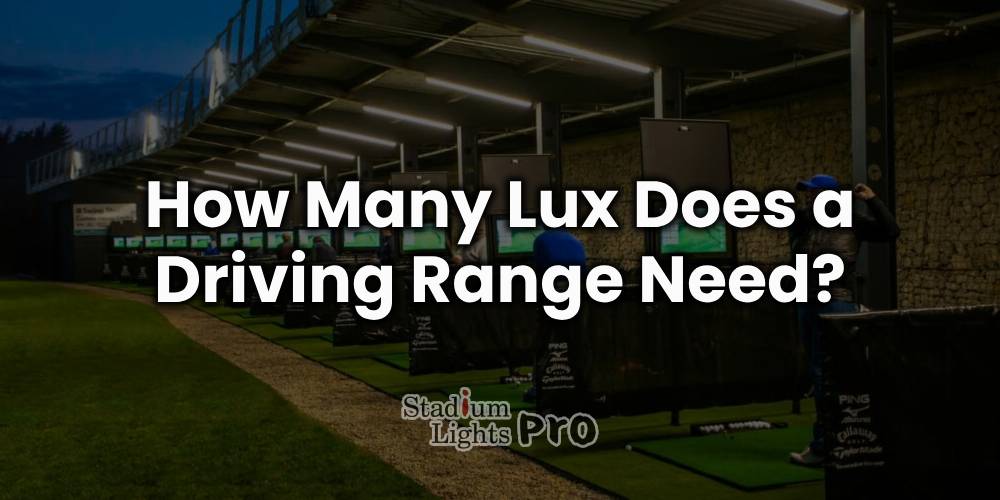
Whether used for professional training, recreational practice, or commercial purposes, the lighting setup must provide adequate illumination for visibility, safety, and comfort. Determining the appropriate lux levels involves understanding several factors such as the size of the driving range, user activities, environmental conditions, and the types of fixtures available. This comprehensive exploration guides you through the process of calculating and selecting the right lux requirements to meet the unique needs of driving ranges.
Understanding Lux and Its Role in Lighting
Lux is a measurement unit that quantifies illumination intensity on a surface. It expresses how much luminous flux is distributed per square meter. In practical terms, lux indicates how bright an area appears to the human eye. The more lux present, the brighter the environment. In the context of a driving range, sufficient lux levels ensure players can clearly see golf balls, the target areas, and any surrounding elements that might impact performance or safety.
Distinguishing Between Lux and Foot-Candles
While lux is widely used internationally, foot-candles (fc) remain common in some regions, especially in the United States. One foot-candle equals approximately 10.764 lux. Both units serve the same purpose of measuring illuminance but differ by system conventions. When choosing lighting solutions or evaluating requirements, it is helpful to be familiar with both units for reference and conversion.
Recommended Lux Levels for Different Driving Range Areas
| Driving Range Area | Recommended Lux Range | Key Notes |
|---|---|---|
| Hitting Bays | 400 – 600 lux (up to 700 lux for professional/televised) | Bright, focused, shadow-free lighting; mounted at 6–9 meters; uniformity ratio ~0.7+ |
| Target Zones (50–100 meters) | 200 – 250 lux | Supports detailed visual feedback; taller poles (10–15 meters); wide beam angles |
| Target Zones (beyond 100 meters) | 100 – 150 lux | Lower intensity acceptable; broad, uniform coverage |
| Walkways and Adjacent Areas | 80 – 100 lux | Ensures safe pedestrian movement near hitting bays; lower mounting heights |
| Parking Lots and Access Roads | 50 – 75 lux | Balancing visibility and energy efficiency; cut-off optics to reduce glare |
Driving ranges are composed of multiple functional zones, each with unique lighting demands that correspond to the activities performed within them. Because of this, a uniform lighting intensity across the entire facility would neither be efficient nor effective. Instead, tailored lux levels should be assigned to different areas to create an environment that enhances visual clarity, supports player performance, promotes safety, and controls energy consumption.
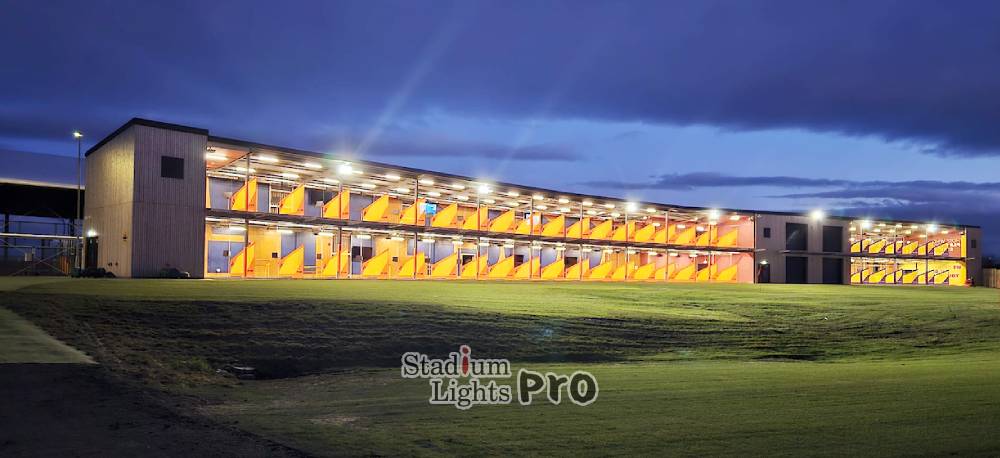
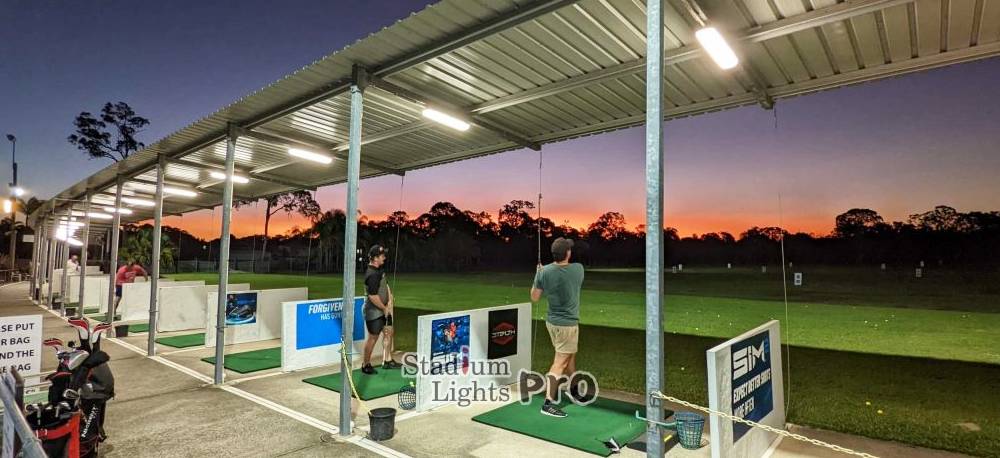
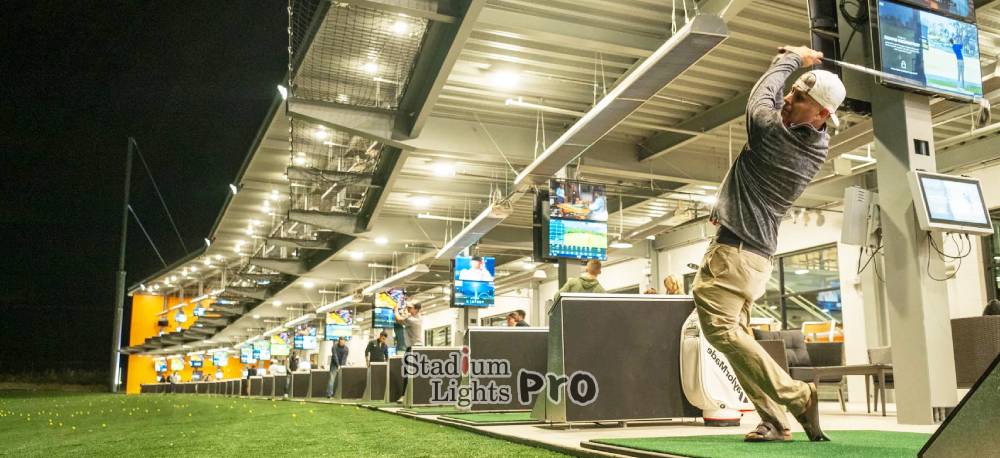
Hitting Bays
The hitting bays are where golfers spend most of their time practicing, making this the most demanding lighting zone in terms of brightness and quality. Golfers need to see the ball clearly on the tee, monitor their swing mechanics, and maintain proper posture and grip. To meet these needs, lux levels between 400 and 600 lux are typically recommended. In some cases, especially for facilities designed for professional use or televised events, lighting intensity can be increased to around 700 lux to provide exceptional clarity and detail.
Achieving these levels involves using fixtures mounted at heights ranging from 6 to 9 meters. This height allows a good balance between light coverage and minimizing direct glare into the golfer’s eyes. Fixtures often employ beam angles of 20 to 40 degrees to focus illumination precisely on the hitting stations while avoiding unwanted spill light.
Uniformity in lighting is also vital within the hitting bays. A uniformity ratio—defined as the minimum illuminance divided by the average illuminance—of at least 0.7 is advisable. This ensures even lighting across the bay, preventing distracting shadows that can disrupt concentration or affect perception of the ball’s position. Additionally, high-quality lighting in this area reduces eye fatigue during long practice sessions, enabling golfers to maintain focus and improve technique.
Target Zones and Landing Areas
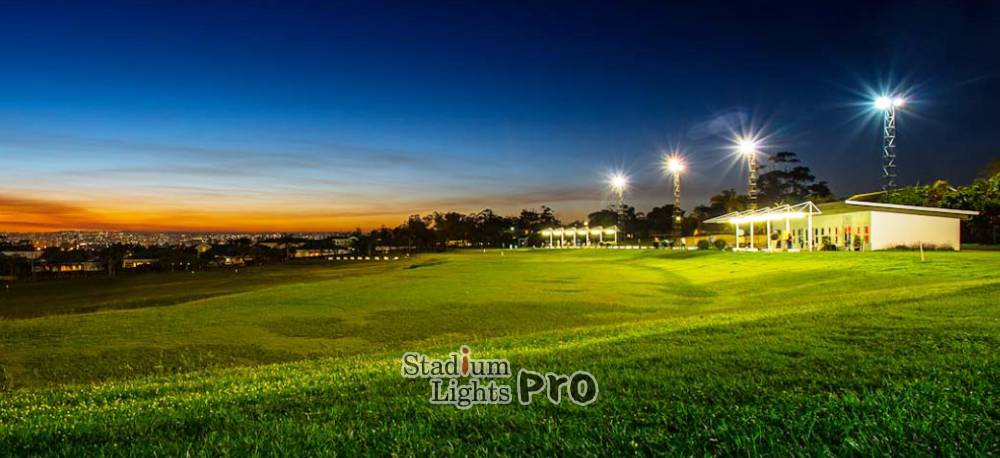
Target zones and landing areas extend outward from the hitting bays and serve as visual feedback zones where golfers track the flight and placement of their shots. The lighting requirements here are less intense than the hitting bays but remain substantial enough to allow clear tracking over varying distances. Recommended lux levels range between 100 and 250 lux, depending on distance and size.
For target zones within approximately 50 to 100 meters of the hitting bays, maintaining illuminance in the range of 200 to 250 lux supports detailed visibility, helping golfers analyze shot precision and ball behavior upon landing. For areas beyond 100 meters, lux values can be reduced to around 100 to 150 lux, as the ability to distinguish fine detail diminishes with distance but visibility remains necessary for safety and shot assessment.
Lighting uniformity across these zones should be managed carefully to avoid dark spots and maintain consistent visibility. Poles holding fixtures in these areas are usually taller, ranging from 10 to 15 meters, which allows for broad beam angles that effectively cover large expanses. Optics that deliver wide, soft-edged beams help distribute light evenly while minimizing glare that could interfere with players’ line of sight.
Walkways and Surrounding Areas
Walkways, parking lots, and peripheral zones support safe access and movement around the driving range facility. These areas do not demand the intense illumination necessary for hitting or target zones but require adequate light to prevent trips, falls, and security risks. Generally, lux levels between 50 and 100 lux are suitable for these purposes.
Walkways adjacent to hitting bays often benefit from higher illumination, approximately 80 to 100 lux, ensuring clear visibility during early morning or late evening hours. Parking lots and access roads are efficiently lit with values in the range of 50 to 75 lux. This balance allows enough brightness for vehicle and pedestrian safety while conserving energy.
Fixtures in these areas are typically mounted at lower heights, about 4 to 6 meters, which helps concentrate light where it is needed and reduces the risk of light pollution. Many installations use cutoff optics or shielding to direct light downward and prevent glare or light spill into adjacent properties or natural environments.
Factors Affecting Lux Requirements at Driving Ranges
The recommended lux levels for driving ranges do not adhere to a universal standard, as the lighting needs can vary widely based on multiple influencing factors. These factors involve both the physical attributes of the range and the specific demands of its users. Careful evaluation of these variables ensures that lighting provides adequate visibility and comfort while optimizing energy use and operational efficiency.
Size and Layout of the Driving Range
The overall size and physical configuration of the driving range play a fundamental role in determining lux requirements. Smaller, more compact driving ranges typically have simpler lighting demands, as the area to be illuminated is limited and often more contained. In contrast, large, sprawling ranges that extend several hundred yards require a more comprehensive lighting strategy to ensure consistent illumination throughout the entire facility.
For instance, the distance a golf ball travels can span 200 yards or more in some professional or commercial ranges, requiring lighting that remains effective at far distances. The placement of hitting bays relative to target zones and ball landing areas also influences the distribution of light. Zones closer to the bays may need higher lux levels for detailed visibility, while distant target areas can be lit with lower intensities.
Large driving ranges face the challenge of maintaining uniform brightness across wide open spaces. Without careful planning, uneven lighting can create dark patches or shadows that hinder visibility and disrupt the playing experience. Achieving uniformity often necessitates higher-output fixtures or a greater number of lighting units strategically positioned to eliminate gaps in coverage.
Additionally, the physical layout—whether the range is open-air, partially enclosed, or indoors—affects how light disperses. Enclosed or covered ranges might reflect or contain light differently, impacting fixture placement and output. Topography and surrounding structures can also cause shadows or light absorption, requiring adjustments in lighting design to maintain consistent lux levels.
Usage Patterns and Time of Day
The time of day when the driving range is most actively used heavily influences the lux requirements. Natural daylight provides ample illumination during daytime hours, drastically reducing the need for artificial lighting. However, many driving ranges operate into the evening or night, where reliance on artificial lighting becomes the sole source of visibility.
Nighttime operation calls for considerably higher lux levels to replicate or exceed the visibility provided by natural sunlight. To maintain safety and performance standards after dusk, driving ranges often employ lighting levels that range from 400 lux in hitting bays to 100 lux or more in target zones. These levels ensure golfers can clearly see the ball, their stance, and the surrounding environment despite the absence of daylight.
Usage frequency and intensity during low-light hours also impact lighting design. Facilities hosting evening leagues, tournaments, or professional training sessions generally prioritize higher lighting levels and greater uniformity. In contrast, driving ranges used primarily during daylight hours or for casual practice may adopt lower lux levels at night to conserve energy.
Seasonal changes and local climate conditions further affect lighting needs. In regions with long winter nights or frequent overcast days, artificial lighting might be required for more hours throughout the year, pushing designers to incorporate efficient, durable lighting solutions that can handle extended use.
Ultimately, understanding when and how the driving range is used enables more precise tailoring of lighting levels, fixture types, and control systems to provide consistent performance and optimize energy consumption.
Safety and Visibility Requirements
Safety considerations are foundational when establishing the appropriate lighting levels for a driving range. The environment must be illuminated well enough to allow both golfers and staff to clearly perceive their surroundings, thereby minimizing the risk of accidents or injuries. This involves ensuring that surfaces, pathways, and operational areas are free from hidden hazards that might cause slips, trips, or falls. Uneven ground, curbs, steps, or any temporary obstacles must be visible at all times, especially during low-light conditions.
Proper lighting also supports the clear identification of other individuals on the range, helping prevent collisions or interference during practice. Since golf balls can travel at high speeds, players need sufficient visibility to safely track balls in flight to avoid potential injuries or property damage. Well-illuminated spaces make it easier to spot errant shots and react accordingly.
Beyond immediate safety, visibility plays a vital role in performance-related aspects. Clear sightlines allow golfers to read distance markers, signage, and flags with ease, facilitating accurate shot placement and course navigation. Furthermore, lighting aids in assessing environmental factors such as wind direction and weather conditions, which can subtly influence gameplay.
For staff, particularly maintenance and security personnel, adequate lighting enhances their ability to monitor the facility, perform necessary upkeep, and respond promptly to emergencies. Emergency exits, pathways, and gathering points must be clearly marked and illuminated to guide individuals safely during evacuations or unforeseen events.
Because safety and visibility are so tightly connected, lighting plans often include minimum lux thresholds across various zones, uniformity standards to avoid harsh contrasts, and measures to reduce glare. Glare can cause visual discomfort or temporary blindness, undermining safety and concentration. Therefore, fixture selection, aiming, and shielding are carefully considered to optimize visual comfort.
Environmental and Local Regulations
Local regulations, ordinances, and environmental considerations play a substantial role in shaping the lighting design and lux levels permitted at driving ranges. Municipalities often enforce rules aimed at minimizing light pollution, energy consumption, and neighborhood disturbance, all of which affect fixture choices and installation methods.
Light pollution restrictions seek to reduce skyglow, glare, and light trespass that can impact nearby residential areas, wildlife habitats, and astronomical observations. To comply, lighting systems may require directional fixtures with cutoff optics that focus illumination downward and inward, limiting stray light. Shielding devices and carefully planned fixture placement are common strategies to confine light within the designated areas.
Energy efficiency regulations influence the selection of lighting technology, pushing many facilities toward LED fixtures or other low-consumption options. These not only reduce operational costs but also contribute to sustainability goals mandated by local governments or environmental agencies.
Ranges situated close to residential neighborhoods often face stricter limits on brightness and operating hours to avoid disturbing residents with excessive light or glare. These constraints might necessitate dimmable systems, timers, or motion-activated lighting to balance usability with community comfort.
Environmental factors such as proximity to wildlife preserves or ecologically sensitive zones further complicate lighting choices. Certain species are sensitive to artificial light, especially nocturnal animals whose behaviors can be disrupted by bright or constant illumination. In such cases, specialized lighting solutions that minimize blue light emissions or implement curfews are sometimes adopted to mitigate ecological impacts.
Ultimately, integrating regulatory compliance with functional lighting needs demands thorough site assessment, consultation with local authorities, and possibly environmental experts. Designing a lighting system that satisfies both human and environmental requirements ensures long-term operational harmony and community acceptance.
Calculating Lux Requirements for Your Driving Range
Determining the correct lux requirements for a driving range involves a systematic process that combines detailed measurements, understanding of functional zones, and the application of lighting principles. The goal is to ensure that each area receives adequate illumination to support user activities, safety, and comfort without wasting energy or creating visual discomfort. The following detailed approach outlines the key steps involved in accurately calculating lux requirements tailored to the specific characteristics and needs of a driving range.
Step 1: Measure the Area to be Lit
The first and foundational step in calculating lux requirements is to obtain precise measurements of the areas requiring illumination. This includes mapping out the dimensions of all relevant zones such as hitting bays, target and landing areas, walkways, parking lots, and any ancillary spaces within or around the driving range.
Measurements should include the length, width, and if applicable, height or elevation changes, as these can influence light distribution. Using laser measuring tools or detailed site plans enhances accuracy. It is essential to calculate the total surface area in square meters for each zone because lux, by definition, is lumens per square meter.
For example, a hitting bay might measure 10 meters wide by 5 meters deep, resulting in an area of 50 square meters. The target zone might be 100 meters long and 50 meters wide, totaling 5,000 square meters. These figures form the basis for subsequent lumen and fixture calculations.
Step 2: Define Lux Levels for Each Zone
After identifying the areas to be illuminated, the next step is to assign appropriate lux levels for each zone based on its function and activity intensity. As discussed earlier, hitting bays require higher lux levels—often between 400 and 600 lux—to support detailed visual tasks such as aligning shots and observing ball contact. Target zones need moderate illumination, typically ranging from 100 to 250 lux, to track shots and assess accuracy over distance. Peripheral areas such as walkways and parking lots usually require lower lux levels, between 50 and 100 lux, sufficient for safety and navigation.
These values serve as target illumination levels and help balance performance with energy efficiency. It is advisable to reference industry guidelines and local standards to fine-tune lux selections based on the specific use case, whether for casual practice, competitive training, or public recreational facilities.
Step 3: Calculate Total Luminous Flux Needed
Once the target lux levels and area measurements are established, the calculation of total luminous flux—expressed in lumens—is straightforward but vital. The relationship between lux, lumens, and area is described by the formula: Luminous Flux (lumens) = Lux level × Area (square meters). Applying this formula separately for each zone provides the lumen requirements needed to achieve the desired illumination. For example, if a hitting bay covers 50 square meters and requires 500 lux, the luminous flux needed is: 500 lux × 50 m² = 25,000 lumens. Similarly, a target zone of 5,000 square meters requiring 150 lux would need: 150 lux × 5,000 m² = 750,000 lumens. Adding the lumen requirements for all zones gives the total lumen output that the lighting system must provide. This aggregate figure guides fixture selection and system design.
Step 4: Select Suitable Lighting Fixtures
With the total lumen output established, the next step is selecting lighting fixtures that can collectively meet or exceed this value. Fixture choice depends on several factors including luminous efficacy (lumens per watt), beam angle, mounting height, and durability.
Modern LED fixtures are favored for their high luminous efficacy, often exceeding 120 lumens per watt, which means fewer fixtures are required to reach the total lumen target compared to older technologies. LEDs also offer better control over beam angles and light distribution, facilitating uniform illumination.
The beam angle influences how light spreads over the target area. Narrow beams focus light intensively on small areas, ideal for hitting bays, while wider beams cover larger target zones. Mounting height affects the footprint of each fixture’s light cone and impacts uniformity and glare. Properly balancing these parameters ensures that fixtures are not over- or under-lighting specific zones.
Other considerations include the fixtures’ IP rating for weather resistance, color temperature for visual comfort, and compatibility with control systems for dimming or scheduling.
Step 5: Consider Lighting Uniformity and Glare Control
Lighting uniformity is critical to prevent areas of harsh shadow or overly bright spots, which can distract golfers and affect performance. Maintaining a uniformity ratio of at least 0.7 (minimum lux to average lux) across playing areas helps create a comfortable visual environment where players can easily adjust to changes in brightness.
Glare control is equally important. Glare can cause eye strain, reduce visual acuity, and lead to discomfort or unsafe conditions. To minimize glare, fixtures should be equipped with appropriate optics such as diffusers, louvers, or shielding. Angling lights properly and choosing fixtures with low glare ratings supports a balanced and pleasant lighting experience.
Incorporating smart lighting controls can also enhance uniformity and glare management. Automated dimming based on occupancy or ambient light sensors helps maintain consistent illumination without over-lighting. Zoning controls allow different areas to be lit independently, adapting to real-time usage patterns.
Taking all these factors into account during the calculation and design phases ensures that the driving range receives effective, efficient, and visually comfortable lighting tailored to its unique characteristics and operational needs.
Understanding Vertical Illumination in Driving Range Lighting
While horizontal illumination ensures that the ground and surface-level targets are properly lit, vertical illumination plays an equally valuable role in driving range lighting. Vertical illuminance refers to the amount of light falling on vertical surfaces—such as the side of a golfer, a swinging club, or a ball in mid-flight. Without adequate vertical lighting, even a well-lit ground can feel visually incomplete, especially when tracking a fast-moving golf ball through the air or observing players’ posture and movement.
For golf driving ranges, the ability to track a ball during its trajectory, often against the night sky, is a function heavily reliant on vertical lighting levels. Providing sufficient vertical illumination helps players follow their shots and supports coaches or instructors in analyzing swing mechanics. It also enhances spectator experience in venues that accommodate visitors or host night-time events.
Importance of Ball Visibility in Flight
A core reason vertical illumination matters in driving ranges is the visibility of golf balls while airborne. Once the ball leaves the tee, horizontal lux levels are no longer sufficient to maintain clear visibility. If vertical light is too low, the ball can quickly vanish into darkness, making it difficult for players to judge distance, spin, and direction. For this reason, vertical lux levels of at least 75 to 150 lux are often recommended in the zones immediately above and beyond the hitting bays.
For professional practice facilities or televised ranges, higher vertical illumination—reaching 200 lux or more—may be applied to ensure the ball remains visible against both near-field and mid-air backdrops, especially when high-speed cameras or ball-tracking systems are used.
Enhancing Swing Visibility and Player Feedback
Vertical lighting also affects how well players and coaches can observe swing form and club movement during practice sessions. Unlike traditional horizontal lighting, which illuminates the surface of the playing area, vertical illumination captures the visual dynamics of a golfer’s entire motion—from initial stance and takeaway to follow-through and finish. This dimensional lighting exposure is especially valuable in training environments where form refinement and biomechanical analysis are priorities.
When a golfer swings, their body turns, shifts weight, and moves through different positions that require proper lighting from multiple angles. Vertical illumination enhances the visibility of posture alignment, hip rotation, spine angle, and wrist position. It also aids in evaluating how the clubface approaches and contacts the ball. These visual cues are subtle and often difficult to observe under flat, single-direction lighting conditions.
In driving ranges that incorporate coaching zones, video review areas, or launch monitors, achieving 150 to 200 lux of vertical illumination around the hitting bay ensures that both human observers and high-speed cameras can pick up detailed movement patterns. This helps with not only swing correction but also injury prevention, as inconsistencies in motion become more visually pronounced and easier to correct when lighting is appropriate.
Lighting Position and Fixture Angle
For optimal swing visibility, lighting fixtures that provide vertical illumination should be placed slightly forward and above the golfer’s position. This orientation casts light onto the front of the body and the club without creating strong back shadows. The angle of the fixture matters significantly; if the beam is too steep, it will light only the top of the golfer’s head or shoulders, leaving the club and hands poorly lit. If it’s too shallow, it may cause glare or fail to illuminate the vertical plane uniformly.
Ideal placement involves poles positioned about 5 to 8 meters in front of the hitting bay, with fixtures mounted at heights of 6 to 9 meters and aimed downward at an angle between 30 and 45 degrees. This configuration provides full-body illumination and keeps the club path visible during its complete arc. Adjustable mounting brackets and beam angle control features further refine coverage, especially for ranges that support varied player stances or accommodate different training equipment setups.
Benefits for Coaching and Training Technologies
Enhanced vertical lighting directly supports modern coaching methods and training technologies. High-speed cameras, 3D motion capture systems, and radar-based launch monitors all rely on clear visibility across the player’s body and equipment. Inadequate vertical lighting can result in frame skips, shadow interference, or inaccurate swing measurements, limiting the effectiveness of these tools.
Additionally, well-lit vertical planes help create high-contrast visuals that are easier for software systems to interpret. This is particularly useful for marker-based motion analysis systems, where reflective points on the body must remain brightly visible at all times. In such cases, vertical illumination is not just beneficial—it becomes a functional prerequisite for precision training environments.
In coaching sessions where instructors provide live feedback or playback video footage, vertical lighting ensures the visuals are both high quality and representative of actual technique. As a result, players receive more accurate feedback, retain key corrections more easily, and experience a more immersive and effective training session.
Uniformity of Vertical Illumination
Just as uniformity plays a fundamental role in horizontal lighting design by eliminating dark zones and hotspots across the surface, vertical uniformity is essential for providing consistent visibility across all visual planes of a driving range. Without sufficient uniformity, golfers and spectators may experience fluctuating visibility, where the ball or player appears brightly lit in one segment and then fades or disappears in another. This visual inconsistency can hinder performance, reduce the effectiveness of training tools, and even contribute to eye strain or fatigue.
Uniformity is typically measured using a ratio of the minimum vertical lux to the average vertical lux across the field of view. A uniformity ratio of 0.4 or higher is considered acceptable for driving ranges, especially in areas where vertical ball tracking or swing observation is expected. Ratios below this threshold indicate lighting that is uneven, which can negatively affect both visual comfort and player accuracy when judging distances or following a golf ball in flight.
Design Challenges in Achieving Uniform Vertical Illumination
One of the primary challenges in achieving vertical lighting uniformity is the geometric complexity of the space being illuminated. Unlike flat surfaces that lie on a single plane, vertical illumination must cover a three-dimensional volume—encompassing the height, width, and depth of the driving range. This includes not only the vertical path of a golf ball but also the full body of the player and surrounding environment. Ensuring this volume is evenly lit requires precise fixture placement, beam angle calibration, and intensity balancing.
In outdoor driving ranges, where distances often exceed 200 meters and elevation changes may occur, this becomes even more difficult. Lighting systems must project sufficient lumens vertically and horizontally, accounting for the drop in intensity over long distances and the need to avoid overlapping beams that create excessive brightness in select zones. Poles equipped with high-mount LED fixtures—typically installed at heights of 12 to 18 meters—are often used to overcome these challenges. Their elevation allows the light to spread broadly and uniformly over both near and far vertical areas, reducing the chance of underlit segments or abrupt light falloff.
Another challenge lies in terrain and background color. Uneven terrain or dark backdrops like tree lines, fences, or buildings can absorb light or distort perception, creating apparent gaps in vertical illumination. These elements must be factored into the lighting simulation process during the design phase to preemptively adjust aiming and intensity levels for maximum consistenc
Integration with Ball-Tracking and Broadcast Systems
Driving ranges equipped with ball-tracking systems, such as radar-based or camera-based technologies, depend heavily on reliable vertical illumination. These systems need consistent and bright lighting across three-dimensional space to accurately record trajectory, velocity, and spin characteristics. Vertical lux levels that are too low can reduce tracking accuracy or create blind spots in data collection.
For televised events or ranges that include video broadcasting, vertical illumination ensures that camera sensors capture clean, clear footage of ball flight, player posture, and environment without noise or shadowing. In such settings, vertical lighting becomes part of the visual design of the entire range, supporting aesthetics as well as function.
Types of Lighting Fixtures Suitable for Driving Ranges
The lighting fixtures selected for a driving range determine not just the brightness and coverage of light, but also long-term factors like maintenance frequency, energy consumption, visual comfort, and adaptability to changing conditions. Each type of lighting technology offers distinct performance characteristics, advantages, and limitations. Understanding the differences between these technologies and how they perform in the context of outdoor sports lighting helps ensure an optimal balance between illumination quality and operational efficiency.
LED Lighting
LED lighting has become the preferred solution for modern driving ranges due to its high energy efficiency, superior light quality, and long operational life. LEDs can produce intense, directional light with minimal heat output, which makes them ideal for environments where visibility and safety are priorities. The luminous efficacy of LED fixtures can exceed 120–150 lumens per watt, which helps reduce electricity consumption significantly compared to legacy lighting options.
Another advantage of LED fixtures is their ability to deliver instant illumination without the warm-up delay common in traditional lamps. This makes them well-suited for driving ranges with variable usage schedules, including those operating during peak hours in the evening or under changing weather conditions. LEDs are also compatible with advanced control systems, including dimmers, motion sensors, and automated scheduling. This allows facility managers to adjust lighting output based on real-time occupancy or ambient light levels, resulting in better energy management and longer system life.
Color temperature flexibility is another feature of LEDs. Many LED sports lighting products offer color temperatures in the 4000K to 5700K range, producing cool white light that enhances visibility and improves color rendering. This is especially beneficial for tracking golf balls in flight and seeing field markers clearly. Moreover, LED fixtures typically last for over 50,000 to 100,000 hours, reducing replacement costs and minimizing disruptions due to maintenance.
Metal Halide and High-Pressure Sodium Lamps
Before the widespread adoption of LEDs, metal halide and high-pressure sodium (HPS) lamps were commonly used in sports and outdoor lighting applications. While still in operation at many older driving ranges, these technologies come with various limitations that make them less suitable for contemporary installations.
Metal halide lamps produce a bright, white light that closely resembles daylight. Their color rendering is relatively good compared to other older technologies, making them a preferred choice for sports facilities in the past. However, they tend to have shorter lifespans, typically between 10,000 and 20,000 hours, and are more prone to lumen depreciation over time. Metal halide systems also require warm-up periods and may take several minutes to reach full brightness, which can be inconvenient during evening operations or power interruptions.
High-pressure sodium lamps, on the other hand, are more energy-efficient than metal halide but emit a yellow-orange light that distorts color perception. While they provide a high lumen output and perform well in foggy or dusty environments, their poor color rendering makes them unsuitable for applications where visual clarity and detail are required—such as in golf driving ranges where tracking white golf balls against varied backgrounds is critical.
Both metal halide and HPS fixtures generate more heat than LEDs and tend to have higher maintenance requirements. Ballasts, lamps, and reflectors often need regular servicing or replacement, increasing long-term operational costs. In many cases, facilities using these technologies are opting to retrofit or fully upgrade to LED systems for improved efficiency and lighting performance.
Considerations for Fixture Placement
Choosing the right type of fixture is only part of the equation. Equally important is how and where these fixtures are installed. Proper fixture placement ensures that light is distributed evenly across all functional zones of the driving range, from hitting bays to landing areas and walkways. A well-designed lighting layout prevents shadows, glare, and overlit or underlit zones that can interfere with play or compromise safety.
Mounting height is a key variable in lighting design. For hitting bays and adjacent areas, poles are often installed at heights ranging from 6 to 9 meters. This height helps ensure directional lighting that illuminates the golfer’s stance, the ball, and the immediate vicinity without causing back shadows or glare into the player’s eyes. For target zones and landing areas, especially those further from the bays, pole heights may range from 10 to 15 meters to provide broader coverage using wider beam angles.
The spacing between fixtures should be calculated based on beam spread, desired uniformity, and terrain features. Overly wide spacing can result in dark gaps, while placing poles too close together may lead to overlapping beams and excessive brightness. Light modeling software and photometric analysis are often used to simulate different arrangements and optimize fixture placement based on the unique shape and usage patterns of the driving range.
Beam angle selection also matters. Narrow beams concentrate light over small zones and are best used in high-lux areas like hitting bays, while wide-angle beams can disperse light across large target zones efficiently
Lighting Control Systems for Driving Ranges
Modern driving ranges benefit not only from high-performance lighting fixtures but also from intelligent control systems that optimize energy use, improve operational flexibility, and extend fixture life. Lighting control systems play a pivotal role in adapting illumination to match changing usage patterns, ambient conditions, and facility demands. These systems integrate advanced technologies such as automation, dimming schedules, motion sensors, and remote monitoring, allowing driving ranges to operate more efficiently and responsively.
With smart lighting controls, operators can ensure that each zone of the range receives just the right amount of light at the right time, avoiding unnecessary over-illumination while maintaining visual comfort and safety. This not only reduces operational costs but also supports compliance with environmental regulations and enhances the overall user experience for both players and staff.
Automated Lighting Schedules
One of the most effective features of lighting control systems is the use of automated scheduling. This allows the lighting system to follow a pre-programmed timetable that aligns with the facility’s operating hours, peak usage periods, or daylight availability. For example, lights in the hitting bays and target zones can be programmed to gradually increase intensity at dusk and decrease at closing time, minimizing manual intervention.
Schedules can be customized by zone, enabling operators to selectively light certain areas during off-peak times or for specific activities such as maintenance, instruction, or tournaments. Systems with astronomical clocks adjust lighting based on sunrise and sunset times throughout the year, further enhancing precision and energy conservation.
Dimming and Zoning Capabilities
Advanced lighting control systems offer a high degree of flexibility through dimming and zoning functions, allowing operators to adapt lighting levels to real-time conditions and usage requirements. The ability to dim lighting fixtures either individually or by designated groups gives driving ranges precise control over energy consumption while maintaining adequate visibility where it’s needed most. This approach not only enhances operational efficiency but also contributes to a more comfortable and user-focused experience for golfers.
Dimming refers to the ability to reduce the light output of a fixture from its maximum capacity to lower levels based on activity or environmental conditions. Unlike traditional lighting systems, which often rely on basic on/off operation, modern LED technology allows for smooth and continuous dimming across a broad range—often from 100% down to 10% or even lower. This capability enables facilities to tailor brightness without experiencing flickering, color shifts, or visual discomfort. During off-peak hours, such as early mornings or late evenings, full illumination across the entire driving range is rarely necessary. Instead, light output can be reduced appropriately to reflect the actual usage, creating a more balanced and energy-efficient environment.
For example, when only a few hitting bays are in use and golfers are focused primarily on short-range practice, the lighting in long-range target zones can be dimmed to approximately 30% to 50% of its maximum intensity. This not only conserves electricity but does so without negatively affecting the player’s experience. Areas like walkways or outlying zones that are temporarily inactive can also be dimmed significantly or turned off entirely, especially when equipped with motion sensors that reactivate the lights only when movement is detected. This dynamic adjustment helps lower energy costs and extends the operational lifespan of the lighting system.
Zoning, meanwhile, provides a framework for segmenting the lighting system into functional regions that can be operated independently. Each zone corresponds to a specific part of the driving range and is assigned its own lighting logic. For instance, hitting bays form one of the main zones and typically require a high level of illumination—around 400 to 600 lux—to ensure that golfers can clearly see their stance, the golf ball, and club alignment. Short-range target zones, which fall within 50 to 100 meters of the bays, might be set to an illumination range of 150 to 250 lux, sufficient for visual clarity during short-distance training. Long-range target zones, stretching out to 250 meters or more, generally function well with lighting levels between 100 and 150 lux, especially when only shot direction or distance needs to be gauged, not fine detail.
Walkways, access routes, and other circulation areas tend to be illuminated more conservatively, usually within a range of 50 to 100 lux. These areas are included within the zoning structure as well and can be programmed to react to pedestrian activity, security routines, or operating hours. By dividing the facility into these zones, operators can activate only the sections currently in use while leaving others in a reduced-power state. For instance, during a private training session involving just three hitting bays, only the lighting associated with those specific bays needs to be fully active. If a corporate event utilizes the front half of the range, the back half can remain in dimmed mode or turned off, resulting in reduced electricity consumption and decreased strain on the system.
Zoning is particularly useful in multi-level or multi-deck driving ranges, where each floor operates as its own functional environment. Fixtures for each level can be independently managed with customized dimming profiles and activation triggers. Higher-end facilities may even offer player-customizable lighting settings within individual bays, allowing users to adjust brightness according to personal comfort, weather conditions, or specific practice goals. This degree of control enhances both performance and enjoyment, reinforcing the perception of the facility as a modern, user-responsive environment.
Operational benefits extend beyond the user experience. From a maintenance perspective, zoning simplifies monitoring and diagnostics. If a fixture or group of lights underperforms, the system can isolate the issue to a specific zone, allowing technical staff to inspect and service without affecting the rest of the range. Fault alerts, energy usage logs, and runtime data can be assigned to individual zones, providing granular insight into how each part of the facility functions over time. This information helps managers schedule maintenance more effectively and fine-tune energy-saving strategies based on real-world usage patterns.
By integrating both dimming and zoning capabilities, a driving range moves toward a more adaptive and efficient lighting infrastructure. These systems ensure that illumination aligns with activity levels and operational goals while reducing waste and extending equipment longevity. The result is a well-balanced lighting environment that remains visually effective for players while supporting long-term sustainability and cost efficiency.
Remote Monitoring and Control Platforms
Modern systems typically include remote access and control interfaces, enabling facility managers to oversee the entire lighting network from a centralized dashboard—either on-site or through cloud-based platforms. These systems provide real-time feedback on power usage, fixture performance, and zone status. Alarms and alerts notify managers of fixture failures, abnormal energy spikes, or environmental issues that may affect lighting performance.
Remote platforms can also be used to make on-the-fly adjustments. For example, if a private event is scheduled in one area of the range, lighting levels can be increased selectively without disrupting other zones. If weather conditions suddenly change, brightness can be adjusted remotely to ensure continued visibility without delay.
Some platforms integrate with broader facility management systems, including HVAC, security, and entertainment lighting. This level of integration supports holistic facility automation, further reducing staffing requirements and improving the user experience through seamless transitions and intelligent environmental control.
Benefits of Intelligent Lighting Controls
When implemented effectively, lighting control systems deliver measurable operational advantages. Energy savings of 30% to 60% are commonly reported, depending on the facility size and usage patterns. Reduced fixture runtime extends the lifespan of LEDs and decreases maintenance intervals, lowering long-term costs and minimizing disruption due to replacement or servicing.
Control systems also enhance the visual quality of the range. Gradual transitions between lighting levels prevent harsh changes in brightness, supporting visual comfort and helping players adjust smoothly to different lighting conditions. The ability to fine-tune illumination helps maintain optimal horizontal and vertical lux levels across all zones, especially important for ranges focused on performance training or night play.
Perhaps most valuably, intelligent lighting controls offer a path to sustainability without compromising usability. As driving ranges face increasing pressure to operate responsibly and efficiently, these systems provide a practical means of reducing environmental impact while maintaining high-quality lighting standards for players and staff alike.
Conclusion
Determining the right lux requirements for a driving range involves careful assessment of space, activity types, safety considerations, and local conditions. Assigning appropriate lux levels to various zones ensures golfers enjoy clear visibility and comfort during their practice or play. Calculations based on area and desired illumination guide the selection and number of lighting fixtures needed. Selecting modern, efficient lighting technology like LEDs can enhance brightness while controlling energy use and maintenance demands. Proper fixture placement and optics contribute to uniform, glare-free lighting, improving user experience. Attention to color temperature and color rendering improves visual clarity and ambiance, while thoughtful design reduces environmental impacts such as light pollution.
Driving range lighting is not merely about brightness but creating an environment that supports performance, safety, and sustainability. With well-informed planning and appropriate technology choices, a driving range can achieve a balanced lighting solution that meets operational goals and user expectations.