
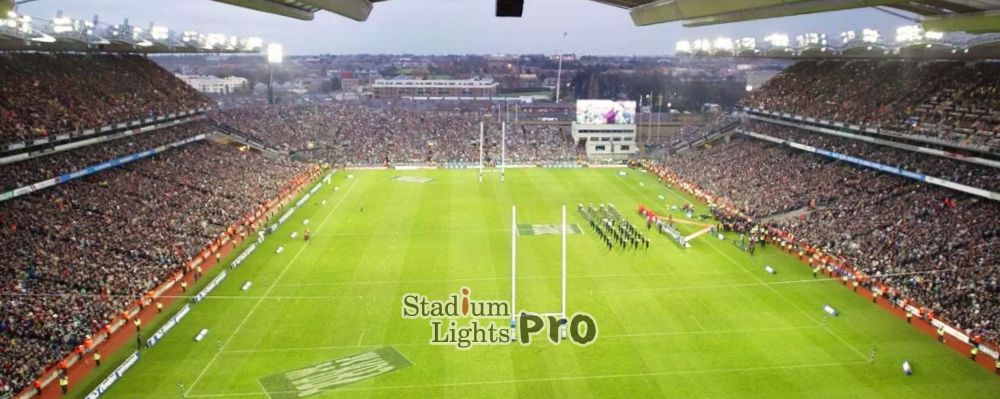
Rugby moves fast, hits hard, and honestly doesn’t stop for anyone—or for bad lighting. Anyone who has watched a match under dim or patchy floodlights knows how quickly the game can feel off. Clear visibility isn’t just for the players chasing the ball; it’s also for referees, coaches, broadcasters, and fans. Getting the right level of brightness across a rugby field might sound straightforward, but it actually involves a mix of lighting standards, measurement methods, and some practical know-how. The goal is usually the same: making the whole field evenly bright enough so that nothing is lost in the shadows.
How to Define Brightness in a Rugby Field
What “Brightness” Really Means for a Rugby Pitch
When people talk about how bright a rugby field should be, they’re really talking about illuminance, which is basically the amount of light that actually reaches and spreads across the playing surface. It’s the difference between a field that feels comfortably visible and one where players are squinting into strange shadows or losing sight of the ball during a high kick. Illuminance is measurable, predictable, and—most importantly—something you can adjust with the right lighting design.
Understanding Lux and Foot-Candles
The most common way to measure that illuminance is through lux (lx). Lux describes how much light hits a one-square-meter area. So if a rugby field needs, say, 500 lux, it means every square meter should ideally receive about that amount of light, not just the center, not just the in-goal, but the full width and length of the pitch.
In the US or in some older lighting specifications, you’ll sometimes see foot-candles (fc) instead. Foot-candles measure how much light falls on one square foot, so the unit is similar, just scaled differently. The conversion is simple enough that lighting techs pretty much know it by heart:
1 foot-candle ≈ 10.76 lux
If someone says a field needs 50 fc, that translates to about 538 lux, which already starts edging into competition-level brightness. When you consider that broadcast-ready rugby fields can push toward 800–1200 lux, you start to see why most modern lighting standards prefer lux: it’s a bit more precise for large outdoor surfaces measured in meters.
What lux actually tells you is how bright the surface looks, not how bright the fixture itself appears. That small distinction matters a lot. Rugby players, coaches, referees, and even spectators care about how clearly they can see the ball trajectory, the player movement, and the field markings, not about how bright the lamps look when you stare up at them. A really powerful fixture can still fail to deliver decent lux levels if it’s aimed badly or too far away.
Why Field Surfaces Depend on Illuminance
One thing that often gets overlooked is how much the grass itself influences perceived brightness. Longer grass blades absorb more light, while freshly cut or wet grass reflects more. It’s not unusual to see a 5–10 percent difference in measured lux depending on field conditions. This is why lighting designers usually plan for a bit of headroom, so the lux levels stay within the required range even on darker turf or rainy nights.
When a game moves quickly—as rugby usually does—having consistent illuminance across the pitch helps players judge depth, speed, and distance. If one zone dips below, say, 300 lux, while another sits at 600 lux, the shift can make the ball feel harder to track.
The Difference Between Lux and Lumen
Lux gets mixed up with lumen (lm) pretty often, even though they describe different sides of the lighting equation. Lumen is the total amount of light a fixture produces. Think of it as the strength of the flashlight itself. You can have a lamp producing 40,000 lumens, but if it’s placed too high or aimed too wide, the actual amount of usable light—the lux on the field—might be surprisingly low.
Lux, on the other hand, shows how much of that lumen output actually lands where it’s needed. That’s why lighting designers focus so much on lux instead of lumens. A rugby field is big, roughly 100 meters by 70 meters, and because the ball travels high and fast, the lighting must be both strong and well-distributed. It doesn’t matter if a fixture pumps out tons of lumens if half of them spill into nearby parking lots or fade into the sky.
Why Lux Matters More Than Just Lamp Output
Modern LED floodlights often advertise big lumen numbers—sometimes 60,000–100,000 lumens per fixture—but rugby lighting plans aren’t impressed by raw output alone. What actually matters is how those lumens translate into horizontal illuminance, vertical illuminance, and uniformity ratios on the pitch.
A field might have expensive fixtures producing huge amounts of light, but if the aiming angles are off by even 3–5 degrees, the lux readings at ground level can drop dramatically in key areas. That’s why installers take lux measurements at multiple points rather than relying on fixture specs alone.
“Usable Light” and Why Designers Talk About It
A lot of lighting designers like using the phrase “usable light”, and lux is pretty much the metric that defines this. Usable light is what actually reaches the turf and supports real gameplay. The ball, the fast sprints, the quick offloads, the converging tackles—all of these rely on good, even lux levels across the field.
When lux is too low or uneven, players might lose sight of the ball during a high kick, especially when it rises above the floodlight beams. Loose-head props, wingers, and referees all lean heavily on clean visibility. So even if a light throws out impressive lumens, it’s the effective lux on the ground that tells you whether the lighting system is doing its job.

The Common Requirement of Rugby Field Lighting
Why Rugby Fields Need Different Brightness Levels
Rugby isn’t a one-size-fits-all sport when it comes to lighting. The brightness you need depends heavily on who’s actually using the field and how fast or intense the gameplay gets. A casual Sunday training run simply doesn’t demand the same lighting muscle as a packed stadium hosting an international test match. The real goal is to match the lux level with the pace, skill level, and visibility needs of the game being played. When those factors line up, players, referees, and even spectators feel that the field “just looks right.”
Recreational and Community-Level Training Needs
For community fields or general after-work training sessions, the standards are much more relaxed. Most setups fall into the 100–200 lux range. That’s enough brightness for players to track the ball, see foot placement, and avoid unnecessary collisions, while still keeping energy use and installation costs manageable. You could think of this range as the “comfortable to play without squinting” category. It’s not stadium-like, but it’s fully usable.
Many community clubs stick with these levels for years because the games are slower paced, the kicks don’t fly as high, and the need for ultra-clear visual detail isn’t as strong. As long as the field doesn’t have dramatic dark patches, the experience feels smooth enough.
Club and Semi-Professional Competition Lighting
Once you step up to club-level matches or semi-pro competitions, everything accelerates—the speed, the physicality, the kicking distance, and the refereeing demands. Here the recommended brightness jumps to around 300–500 lux, and sometimes slightly higher depending on regional standards.
At this stage, players rely more on peripheral vision, and referees need clearer views to make accurate calls in split-second scenarios. If the field only delivers 200 lux during this kind of match, players feel like the action is fading into the shadows. It’s similar to watching through an underexposed camera, where movement looks dull and slightly blurry. A proper 300–500 lux setup brings back clarity and detail.
Professional, Elite, and International Match Requirements
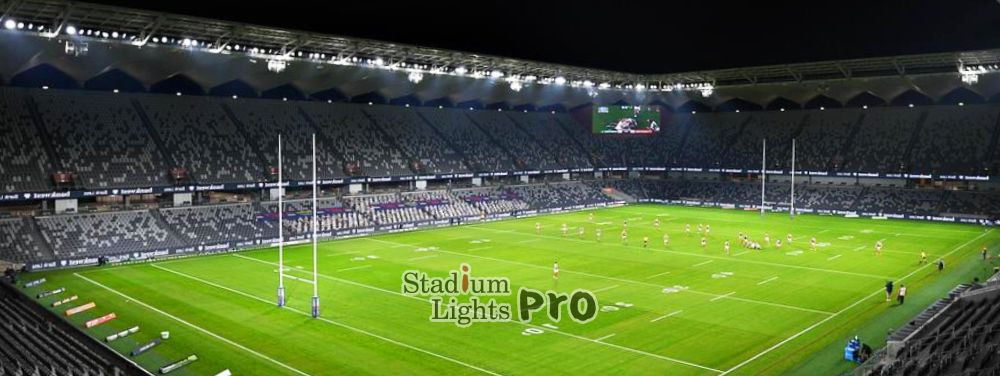
Things really change when you reach professional leagues or international tournaments, especially ones that involve HD or 4K broadcasting. It’s pretty normal for major stadiums to deliver 800–1200 lux, and some push past 1500 lux for premium broadcast quality.
High-end cameras need strong horizontal and vertical lighting to avoid noise, ghosting, and motion blur. A rugby ball kicked thirty meters into the air should remain fully visible the entire way up, not vanish into a dim pocket between floodlight beams. That level of clarity is what helps slow-motion replays pick up details like fingertip touches, knock-ons, grounding, or obstruction calls.
Broadcasters also care a lot about consistency, so designers run lighting simulations and 3D aiming plans before the system is installed. When a TV camera pans across the field, any dark band or patch shows up immediately on screen. Stadiums with poor uniformity quickly hear about it from production teams.
A Quick Look at Typical Brightness Expectations
Even though the exact numbers vary by region, the general brightness spread looks something like this:
| Competition Level | Horizontal Illuminance (lux) | Vertical Illuminance (lux) |
|---|---|---|
| Recreational / Training | 100–200 | — |
| Club / Semi-Pro | 300–500 | — |
| Professional / International | 800–1200 (up to 1500+) | 500–1000 |
These ranges keep the ball, players, and field markings consistently visible across all angles and camera viewpoints.
Areas of a Rugby Field That Need More Light
Why the In-Goal Zones Matter More Than People Expect
 The in-goal areas tend to get wild during matches. This is where try dives happen, grounding decisions get reviewed, and defenders make last-second tap tackles. If these end zones sit even 20–30% dimmer than the main field, referees and TMO footage struggle to confirm grounding. A slightly dark in-goal space can literally change how a match is called.
Lighting designers now pay extra attention to these areas, making sure the lux levels don’t taper off near the corners or dead-ball lines. Even distribution is the name of the game here because the last five meters often decide the scoreboard.
Why Sidelines and Technical Zones Need Decent Visibility
It’s easy to forget how much activity happens on the sidelines. Coaches call plays, medics assess injuries, and officials check substitutions and foul play. If the touchlines and technical areas sit in low light, basic calls like “foot on the line” or boundary decisions become harder to confirm.
Older stadiums sometimes favored stronger lighting down the center of the pitch because that’s where most play occurs. Modern standards, especially those influenced by broadcast guidelines, now push for fewer “hot spots” and fewer “shadow bands.” These high-contrast areas can mess with depth perception and make a moving ball look unpredictable. Smoother, more balanced lighting gives players better reaction time and helps spectators feel like the entire field is alive.
The Role of Precision in Floodlight Aiming
Even a small shift in a floodlight’s tilt—sometimes only 3–4 degrees—can change the brightness of a corner by dozens of lux. That’s why aiming accuracy is such a big deal. A strong light pointed in the wrong direction is basically wasted output. Proper aiming ensures that the brightness stays even from try line to try line.
Vertical and Horizontal Illuminance
What Horizontal Illuminance Actually Affects
Horizontal illuminance is the one most people normally think of when they imagine field lighting. It’s measured directly on the playing surface, essentially telling you how bright the grass itself looks. Players rely on horizontal lux to track the ball on the ground, see passing lanes, identify ruck boundaries, and read field markings. Depending on competition level, this can range from 300 to 1200 lux or more.
But even if the average horizontal level looks great, that doesn’t guarantee the field is actually easy to play on. That’s where vertical lighting steps in.
Why Vertical Illuminance Changes Everything
Vertical illuminance is measured around eye level, usually at 1.5 meters above the ground, and it focuses on how well players’ bodies, faces, jerseys, and numbers are lit from different directions. This is the type of lighting that helps players read each other’s movements, especially when a high ball is dropping fast or a defender is rushing in from the blind side.
For broadcast conditions, vertical illuminance matters even more. If the vertical level is too low, faces and uniforms look dark on screen, and the image starts losing clarity. Viewers might have trouble identifying players, and slow-motion replays lose detail. To avoid that, professional fields usually aim for 500 lux or more of vertical light, sometimes hitting 700–1000 lux depending on the number of camera angles.
Why Vertical Light Must Be Checked From All Angles
Since rugby fields are filmed from multiple camera positions, engineers measure vertical lux from four directions—0°, 90°, 180°, and 270°. The idea is to avoid situations where a player looks bright from one camera but instantly falls into shadow when the feed switches to another angle.
In modern stadiums, this multi-direction vertical lighting is what gives matches that clean, polished, consistent look, no matter where the camera is positioned.
How to Measure the Brightness in a Right Way
Using a Grid Point Layout
Measuring the brightness of a rugby field isn’t something you can do by randomly pointing a meter around and hoping the numbers make sense. The proper way is to set up a grid layout across the whole pitch so every part of the field is accounted for. Most lighting standards recommend spacing the grid points somewhere between 5 to 10 meters, depending on the required accuracy. With a typical rugby pitch measuring about 100 meters long (plus the in-goal areas) and roughly 70 meters wide, that usually results in anywhere from 70 to 100 measurement points, sometimes more when the evaluation needs to be especially detailed.
The idea is to build a complete picture of the field’s illumination level. Corners, the center zone, the touchlines, the 22-meter areas, and the in-goal sections all need enough light to stay fully visible. A field that averages 600 lux but dips to 250 lux in the corners will still feel uneven during a match, so the grid method helps catch those darker pockets. Once all the values are recorded, they’re used to map out the overall brightness and to calculate the uniformity ratio, which is just as meaningful as the lux number itself. You can think of this grid as a diagnostic scan for the field’s lighting health.
Using a Lux Meter and Converting Units
A standard handheld lux meter works perfectly fine for these measurements as long as it’s calibrated and used consistently. The measurement is typically taken at about 1 meter above the turf, often the standard in many lighting guidelines, because it represents a realistic angle of how players and referees perceive light during movement. The meter should face straight up or in the required direction depending on whether you’re checking horizontal or vertical illuminance.
If you’re dealing with foot-candles instead of lux, the conversion stays simple. You just divide the lux value by 10.76. So if you record 430 lux, that’s around 40 fc. This comes in handy when you’re translating international standards or comparing legacy lighting data with newer LED installations.
But honestly, the toughest part isn’t the tool—it’s the consistency. Even ambient conditions can mess with a reading. Nearby streetlights, passing cars, ground-level reflections from wet grass, or even a bright moon can bump lux values slightly. That’s why measurements should ideally be taken under stable conditions with all floodlights warmed up to their full output. LEDs reach their peak brightness immediately, but metal-halide lights can take 10–15 minutes to stabilize, so measuring too early can give misleading numbers.
Recording and Analyzing Uniformity
Uniformity is the factor that separates “bright” fields from well-lit fields. It’s the measurement that tells you how evenly the light spreads across the entire pitch. A field might hit an impressive 800 lux on average, but if some areas dip below 400 lux, players will literally feel the difference as they move across the turf.
Uniformity is usually expressed as minimum lux ÷ average lux. A decent competition-level rugby field often needs a uniformity ratio around 0.6 to 0.7, while higher-end broadcast fields push toward 0.7 or above. Stadiums used for international broadcasts sometimes aim for 0.75+, because cameras reveal uneven lighting more dramatically than the naked eye.
Lighting designers analyze the lux map created from all the grid points to find any dark zones, glare areas, or overlit patches. Fixing these issues can be surprisingly subtle. Sometimes it means re-aiming a floodlight by a few degrees, changing a beam angle, or adjusting the tilt so the light hits the field more evenly. In some cases, poor uniformity reveals design issues like poles being spaced too far apart or fixtures using mismatched optics.
A well-balanced lighting layout feels smooth across the pitch. Players won’t suddenly run from a bright zone into a dim one, and referees won’t struggle to see quick offsides or ball movements near the touchline.
Checking Vertical Lux for Broadcast Requirements
If the field is used for televised matches, vertical illuminance becomes a big part of the measurement process. Unlike horizontal lux, which is about how bright the surface looks, vertical lux measures how well the players themselves are illuminated from the sides. This matters a ton for cameras—faces, jersey numbers, and line breaks need to be visible from every angle.
To check vertical lux, the meter is held upright at about 1.5 meters height, facing north, south, east, and west. This ensures the lighting gives enough coverage for cameras located around the stadium. Broadcast guidelines often aim for ≥500 lux vertically, and some professional stadiums go higher—often 700–1000 lux—to meet multi-camera requirements and avoid any awkward shadows that might mess with TV replays.
Even though vertical lux might look like a “bonus” measurement, it plays a major role in producing clear footage. When a match is broadcast globally, small lighting differences show up instantly. Uniform vertical light helps maintain sharp, natural-looking images, especially during things like high kicks, scrums, and fast-paced passing sequences where the camera follows multiple moving players at once.
Tips to Have the Correct Brightness
Aim for Good Fixture Positioning and Angles
Floodlights don’t just need strong output; they need to be aimed with accuracy. Even a tiny shift in angle—sometimes as small as 2–3 degrees—can change the brightness of a zone by tens of lux. That’s why lighting engineers sometimes say aiming is half the job. Over time, poles settle, brackets loosen, and fixtures get bumped during maintenance. If no one checks them for a few years, the field ends up with strange bright spots or surprisingly dim patches.
A quick alignment check, done maybe once a year or even every two seasons, keeps everything consistent. It also helps avoid situations where light starts drifting toward the stands or the neighboring parking lot instead of the turf. When fixtures are positioned properly and the aiming plan is followed, the field naturally feels smoother and more evenly lit.
Choose Proper Beam Spread
Since rugby fields are wide and the ball spends a lot of time in the air, the beam spread of each fixture matters a lot. A floodlight with a beam that’s too wide ends up wasting light outside the playing area, and players might even feel some unnecessary glare. If the beam is too narrow, you get harsh bright zones surrounded by sudden drops in visibility. Manufacturers usually offer optics ranging anywhere from 10° to 60°, and picking the right combination can completely change how balanced the field feels.
Many stadiums actually mix different beam angles—wide beams for the near zones, narrower beams for long-distance reach, and medium beams to tie everything together. This blending approach helps maintain both horizontal and vertical illuminance at levels suitable for fast gameplay and clear camera work. It’s almost like painting the field with light, just with optics instead of brushes.
Maintain the Fixtures Regularly
Even the best lighting system won’t stay perfect forever. Dust, pollen, insects, water spots, and general outdoor wear can reduce usable light by anywhere from 5–20%, sometimes more in dusty regions. LEDs keep their brightness longer than older lamps, but their lenses still need cleaning. If the lens gets cloudy or develops a film, the light scatter changes and the lux level drops right away.
A simple cleaning routine once or twice a year makes a huge difference. This includes checking for cracked lenses, replacing worn gaskets, tightening mounting brackets, and making sure moisture hasn’t seeped inside. If one fixture starts to look dim, it can drag down uniformity across the whole grid. Keeping everything in good shape helps the lux readings stay near the original lighting design instead of slowly drifting downward over time.
Avoid Overlighting by Accident
It’s funny how often people assume brighter automatically means better. In reality, overlighting can be just as annoying as poor lighting. Too much brightness, especially from low-mounted fixtures, produces glare that hits players directly in the eyes. That’s not great when trying to catch a high ball spinning through the air. Spectators also notice glare, especially during night matches where their eyes have already adjusted to darker surroundings.
There’s also the energy side of it. Adding an unnecessary 200 or 300 lux to a field doesn’t improve the playing experience, but it does bump up operating costs. The sweet spot is usually hitting the recommended lux range and keeping the uniformity ratio tight. Flooding the field with excess lumen output just leads to more shadows, more glare, and more wasted power.
Think About Future Upgrades
Technology moves fast, and rugby fields lit with older metal-halide lamps often struggle to meet modern expectations. Metal-halide lights lose luminance gradually and can drop 30–40% of their output over a few years. They also create color shifts and slow warm-up times, making them tough for quick training sessions or televised matches.
LED systems, on the other hand, hold their brightness very consistently and allow precise dimming, aiming, and beam control. If a field requires constant maintenance just to stay above 300–400 lux, or if one corner always seems darker than the rest, it might be time to consider an upgrade. Even partial upgrades—like replacing a few key fixtures or updating the optics—can help the field stay within the right lighting standard without requiring a full overhaul.
An upgrade also helps future-proof the field for things like HD broadcasting, multi-angle camera setups, and improved vertical illuminance standards. It makes everything easier: fewer maintenance cycles, more predictable lux readings, and better control over the field’s lighting personality.
A Few Words Before We Wrap Up
Getting the brightness right on a rugby field isn’t just about hitting a target number on a meter. It’s more like tuning the whole visual experience so that every part of the game feels clear and easy to follow. From understanding lux and foot-candles to making sure the grid measurements come out evenly, every step helps create a field that feels consistent and professional.
A well-lit pitch lets players trust their instincts, lets referees follow the action cleanly, and lets spectators enjoy the match without squinting into shadows. When the brightness lands exactly where it should be, the game just flows better. And honestly, when you see a field glowing evenly on a crisp evening, it feels like rugby the way it’s meant to be played.