Good lighting can completely change the way a squash court feels and performs. Squash is one of the fastest racket sports in the world, with players reacting to a small ball that can travel at speeds exceeding 200 km/h during competitive play. When lighting is uneven, too dim, or creates excessive glare, players may struggle to track the ball accurately, leading to a less enjoyable experience and reduced performance.
Many squash facilities built 10 to 20 years ago still rely on metal halide or mercury vapor lighting systems. While these technologies were widely used in the past, modern LED sports lighting offers significantly higher efficiency, better light quality, lower maintenance requirements, and much longer operating life. Facility owners are increasingly upgrading their courts not only to reduce electricity costs but also to improve the playing environment for members and tournament participants.
Whether you are designing a brand-new squash court or planning an LED retrofit, understanding lighting standards, fixture selection, court layouts, and installation considerations can help ensure a successful project.
Squash Court Lighting Standards and Design Requirements
Unlike many indoor areas where people mainly move at a slower pace, squash requires players to react quickly, judge the speed and direction of a small ball, and make split-second decisions. Because of this, lighting needs to create a comfortable visual environment where the ball remains easy to follow from every corner of the court.
Many facility owners start with a simple question: “How bright should a squash court be?” The answer depends on how the court will be used, whether it is designed for casual training, daily club activities, professional competitions, or broadcast events.
The right lighting design should balance several factors, including illuminance level, uniformity, color quality, glare control, and energy efficiency. A court with excellent lighting does not necessarily need the highest number of watts. Instead, it needs the right combination of brightness and optical performance.
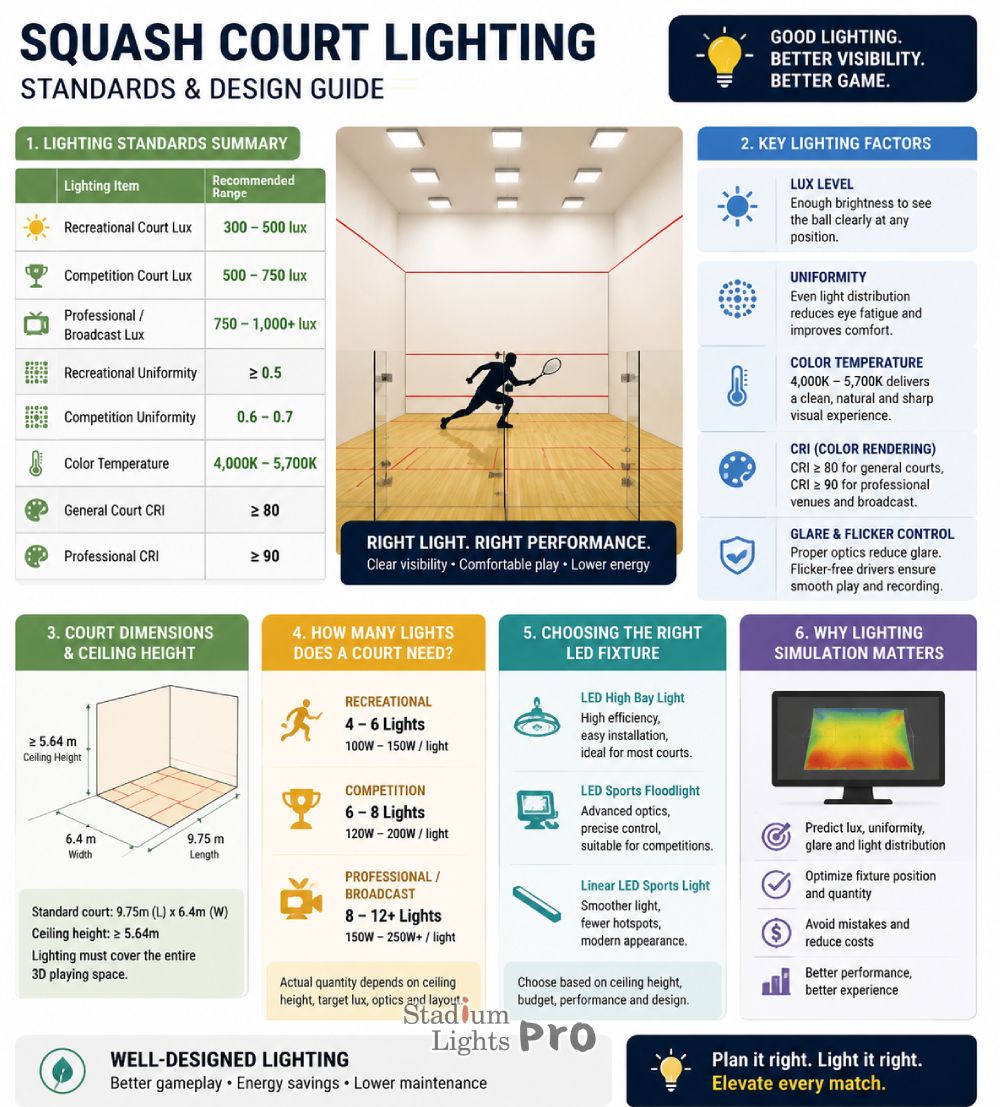
| Lighting Item | Recommended Range |
|---|---|
| Recreational Court Lux | 300–500 lux |
| Competition Court Lux | 500–750 lux |
| Professional / Broadcast Lux | 750–1,000+ lux |
| Recreational Uniformity | ≥0.5 |
| Competition Uniformity | 0.6–0.7 |
| Color Temperature | 4,000K–5,700K |
| General Court CRI | ≥80 |
| Professional CRI | ≥90 |
Recommended Lux Levels for Squash Courts
Lux is the measurement used to describe the amount of light reaching a surface. In squash court lighting design, lux level is one of the first technical specifications considered because it directly affects how clearly players can see the ball and the playing area.
For recreational squash courts, a lighting level of around 300 to 500 lux is commonly suitable. This range provides enough brightness for daily practice, fitness clubs, schools, and community sports centers without creating unnecessary energy costs.
For club-level competition courts, the recommended lighting level is usually higher, around 500 to 750 lux. This additional brightness helps players maintain better visibility during faster rallies, especially when the ball moves quickly between different areas of the court.
Professional competition venues and courts used for television coverage may require 750 to 1,000 lux or above. Broadcast-level lighting often has stricter requirements because cameras need sufficient illumination to capture fast movement clearly without creating dark areas or excessive contrast.
However, higher lux does not always mean better lighting. Simply installing more powerful fixtures can create problems such as glare, uneven brightness, and uncomfortable reflections from court surfaces. A properly designed system focuses on delivering the right amount of light exactly where players need it.
Why Proper Lux Levels Matter for Player Performance
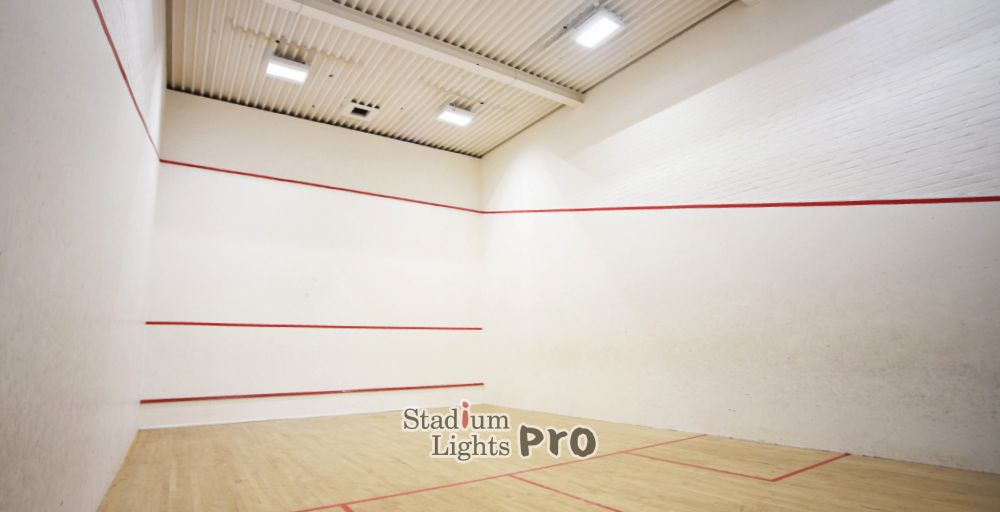
In squash, players are constantly switching their focus between the ball, the front wall, side walls, and their opponent’s movement. If lighting levels are too low, the ball can become difficult to track, especially when it travels close to the walls or moves through shadowed areas.
A common issue in older squash facilities is that the center of the court appears bright while the corners or front wall areas feel darker. Although the average lux reading may seem acceptable, the uneven distribution creates a less comfortable playing experience.
Modern LED lighting systems solve this problem by using carefully designed optics and fixture positioning. Instead of producing random brightness across the room, sports lighting aims to create consistent illumination throughout the entire playing area.
Understanding Lighting Uniformity
Brightness is only one part of a successful squash court lighting design. Uniformity plays an equally important role because it determines how evenly light is distributed across the court.
Uniformity is usually calculated by comparing the minimum illuminance level with the average illuminance level. A higher ratio means the lighting is more consistent.
For recreational courts, a uniformity ratio of approximately 0.5 or higher is often acceptable. Competition-level courts typically aim for 0.6 to 0.7, while high-end professional venues may target even higher performance levels.
For example, imagine a court with an average illumination of 600 lux. If the darkest area only measures 250 lux, players will notice obvious differences when moving around the court. However, if the lowest reading is closer to 400 lux, the lighting environment feels much smoother and more natural.
Good uniformity reduces eye fatigue because players do not need to constantly adjust between bright and dark areas. This is especially useful during longer matches where visual comfort can influence overall performance.
Choosing the Right Color Temperature for Squash Courts
Color temperature describes the appearance of light and is measured in Kelvin (K). It influences the atmosphere of the court as well as how clearly players perceive objects.
For most squash facilities, 4,000K to 5,700K is considered a suitable range. A neutral white light around 4,000K to 5,000K creates a comfortable environment for everyday use, making it popular for clubs, gyms, and training centers.
For competition courts, many designers prefer around 5,000K to 5,700K because cooler white light provides a cleaner and sharper visual appearance. It can help players distinguish the ball more easily against the court background.
Lighting below 3,500K usually creates a warmer atmosphere that may feel comfortable in restaurants or lounges, but it is generally less suitable for high-speed sports applications. Warm lighting can reduce the sense of brightness and may not provide the crisp visual effect required for squash.
A balanced color temperature also improves the overall appearance of the facility. A well-lit squash court looks more professional, which can enhance the experience for both players and spectators.
Color Rendering and Visual Quality
Color Rendering Index, commonly known as CRI, measures how accurately a light source displays colors compared with natural sunlight.
For most squash courts, a CRI rating of 80 or above provides good performance. Facilities that host professional tournaments, training events, or video recordings often choose fixtures with CRI 90 or higher.
High-quality lighting allows the colors of the squash ball, court lines, walls, and surrounding environment to appear more natural. This may seem like a small detail, but accurate color perception contributes to a more comfortable visual experience.
A lower-quality LED fixture may provide enough brightness but still make the environment feel flat or uncomfortable. This is why professional sports lighting projects evaluate not only lumen output but also the quality of the light itself.
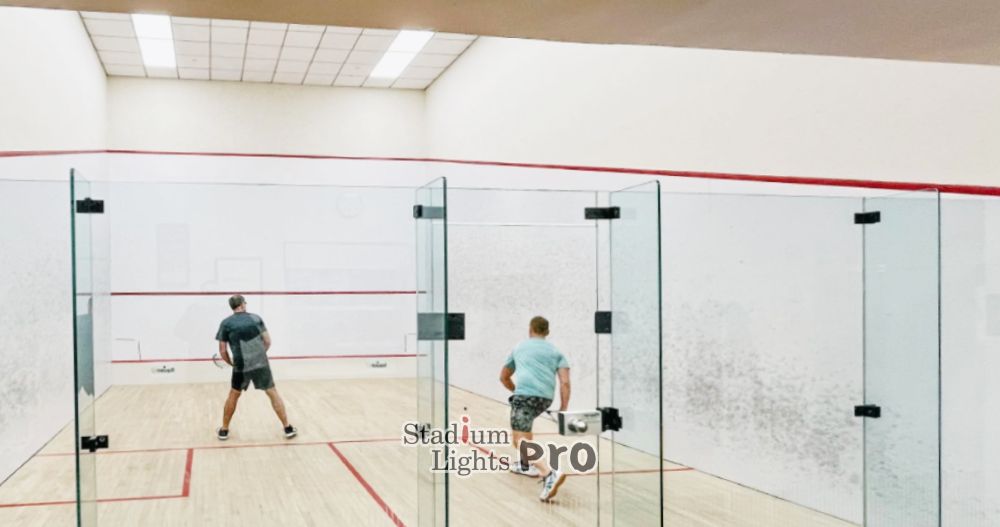
Managing Glare and Flicker Problems
Glare is one of the most common complaints in indoor sports lighting. In squash, players frequently look upward while tracking high shots, which means poorly positioned fixtures can easily enter their field of vision.
Older lighting systems often used simple reflectors that created strong bright spots. Modern LED sports lights use improved optical designs, including anti-glare lenses, shielding systems, and controlled beam angles.
A well-designed fixture directs light toward the playing area instead of allowing unnecessary light to shine into players’ eyes.
Flicker is another factor that is becoming more relevant, especially for courts used for competitions or video recording. Low-quality LED drivers may create invisible flickering that affects camera performance and can cause visual discomfort for some users.
High-performance LED systems normally use reliable drivers designed for stable output and low flicker operation. This creates a smoother environment for both players and spectators.
Squash Court Lighting Design Guide
Understanding Court Dimensions and Ceiling Height
Before selecting fixtures, designers need to understand the physical characteristics of the squash court.
A standard squash court is approximately 9.75 meters long and 6.4 meters wide, with a typical ceiling height of around 5.64 meters or higher. However, many commercial sports facilities have different ceiling structures, which can significantly affect lighting performance.
Squash is a three-dimensional sport. The ball does not simply move across the floor. Players hit shots high onto the front wall and side walls, meaning the lighting system needs to provide good visibility throughout the entire playing space.
Ceiling height directly influences fixture selection. A court with a lower ceiling may require wider beam angles to spread light evenly. A higher ceiling may need narrower optics to ensure sufficient light reaches the playing surface without wasting energy.
Choosing the wrong fixture type for the ceiling height can result in poor uniformity, excessive glare, or insufficient brightness.
How Many Lights Does a Squash Court Need?
There is no single number that works for every squash court because lighting requirements vary depending on fixture efficiency, ceiling height, target lux level, and optical design.
For a typical recreational squash court, a layout using 4 to 6 LED fixtures with power ratings around 100W to 150W per fixture may achieve suitable performance.
For club competition courts, designers often use approximately 6 to 8 fixtures, usually ranging from 120W to 200W each, depending on the required illumination level.
Professional courts may require 8 to 12 or more fixtures, especially when higher lux levels, broadcast requirements, or international competition standards are involved.
The fixture quantity should not be decided only by counting lights or matching the wattage of old lamps. A professional lighting design considers the total lumen output, beam angle, installation height, and light distribution pattern.
For example, two 150W LED fixtures from different manufacturers may produce completely different results. One may create strong hotspots while another may provide smoother coverage because of better optical engineering.
Selecting the Right LED Fixture Type
Choosing the right LED fixture is one of the most important decisions in a squash lighting project. Different fixture designs offer different advantages depending on the application.
LED high bay lights are commonly used in indoor sports facilities because they provide strong output and are relatively simple to install. They are a practical choice for many club and recreational courts, especially where ceiling heights are moderate to high.
LED sports floodlights are often selected for higher-performance applications. Their advanced optical control allows designers to direct light more accurately, reducing wasted light and improving player comfort.
Linear LED sports lighting has also gained popularity in modern squash facilities. The longer fixture shape can help create smoother illumination with fewer concentrated bright points. This can provide a clean appearance while improving visual comfort.
The ideal fixture choice depends on several factors, including the court design, budget, required performance level, and installation conditions.
Why Lighting Simulation Matters Before Installation
Even experienced contractors can benefit from lighting simulation before starting a squash court project.
Software such as DIALux or AGi32 allows designers to create a digital model of the court and test different lighting arrangements before purchasing equipment.
A simulation can show expected lux levels, uniformity results, glare performance, and fixture positioning. This helps avoid common problems such as installing too few lights, creating dark corners, or placing fixtures in locations that cause glare.
For example, changing a fixture position by only 0.5 to 1 meter can sometimes make a noticeable difference in light distribution. Simulation helps identify these adjustments before installation, saving both time and modification costs.
For facility owners, a professional lighting calculation also provides clearer expectations. Instead of guessing how the finished court will look, they can review performance data before making the final investment.
A successful squash court lighting design combines technical planning with practical experience. By considering lux levels, uniformity, color temperature, CRI, glare control, fixture selection, and installation conditions, facility owners can create a lighting environment that supports better gameplay while improving energy efficiency and reducing future maintenance needs.
LED Replacement Guide for Existing Squash Courts
Why Facilities Are Replacing Metal Halide and Mercury Vapor Lighting
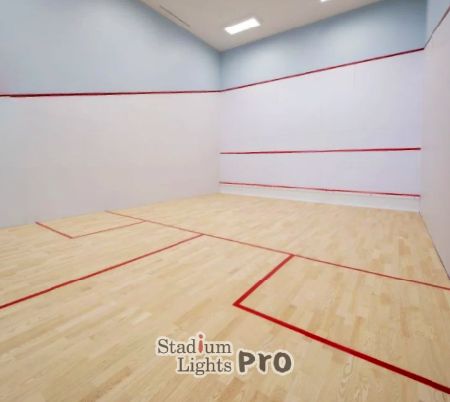 Many older squash courts were originally equipped with metal halide or mercury vapor fixtures because these technologies were among the best options available at the time.
However, aging systems often create several challenges. Light output gradually decreases, maintenance costs increase, and replacement lamps become harder to source.
Metal halide fixtures also require warm-up and restrike periods. After a power interruption, it may take several minutes before full brightness is restored. LED fixtures eliminate this issue entirely by providing instant illumination.
Energy savings are another major factor. Many LED retrofit projects reduce lighting energy consumption by 50% to 70%, allowing facilities to lower operating costs while improving lighting quality at the same time.
Metal Halide to LED Conversion Guidelines
When replacing metal halide fixtures, wattage should not be used as the only comparison.
A traditional 250W metal halide fixture can often be replaced by a 100W to 150W LED fixture. A 400W metal halide fixture may be replaced by a 150W to 200W LED model, while a 1,000W metal halide fixture may correspond to a 300W to 450W LED solution.
The exact replacement depends on fixture efficacy, optical design, mounting height, and desired lux levels.
A modern LED sports light producing 160 lumens per watt can significantly outperform older metal halide systems while consuming substantially less electricity.
Mercury Vapor to LED Replacement
Mercury vapor technology is generally much less efficient than modern LED lighting.
For example, a 250W mercury vapor fixture may often be replaced by a 100W LED fixture. A 400W mercury vapor fixture can frequently be replaced by approximately 150W of LED power while delivering similar or improved illumination levels.
Many facilities upgrading from mercury vapor systems notice immediate improvements in brightness consistency, color quality, and player satisfaction.
Looking Beyond Wattage
One common mistake during retrofit projects is focusing entirely on wattage comparisons.
Two LED fixtures with identical wattage ratings can produce very different results depending on optics, driver quality, thermal management, and overall fixture design.
A lower-wattage premium sports light may outperform a higher-wattage budget fixture because more of the generated light reaches the playing surface efficiently.
For that reason, evaluating lux calculations, lumen output, and photometric reports is generally more reliable than comparing wattage alone.
Ceiling and Installation Considerations Before an LED Upgrade
Evaluating Existing Mounting Conditions
Before ordering new fixtures, it is worth taking time to inspect the existing installation.
Factors such as mounting points, suspension systems, structural supports, wiring conditions, and ceiling accessibility can all influence project costs and installation timelines.
In some facilities, the existing infrastructure can accommodate new LED fixtures with minimal modifications. In others, additional work may be needed to achieve the desired layout and performance.
When Existing Fixtures Cannot Be Directly Replaced
Many LED sports lights differ significantly from older fixtures in both size and mounting configuration.
The mounting holes may not align, fixture dimensions may vary, and weight distribution can differ from the original installation.
In these situations, custom mounting brackets often provide a practical solution. A properly designed bracket can allow the new fixture to utilize existing mounting points, reducing labor requirements and minimizing disruption to the facility.
When Ceiling Modifications Make Sense
Some projects benefit from a more comprehensive redesign rather than a simple one-for-one replacement.
If the original fixture locations were poorly positioned or if the facility is targeting significantly higher lux levels, relocating fixtures may improve overall performance.
Ceiling modifications may include installing new support rails, adjusting suspension locations, upgrading wiring routes, or reinforcing mounting structures.
While these changes increase initial installation costs, they can often produce better lighting uniformity and a more professional final result.
Creating a Better Playing Environment
A well-designed squash court lighting system does far more than illuminate a room. It helps players track the ball comfortably, supports consistent performance, improves the appearance of the facility, and reduces long-term operating costs.
Modern LED sports lighting gives facility owners access to higher efficiency, better visual quality, longer service life, and greater control over the playing environment than ever before. Whether the project involves a brand-new squash court or a retrofit of aging metal halide or mercury vapor fixtures, focusing on lux levels, uniformity, glare control, color quality, and proper fixture placement can lead to noticeably better results.
If you are planning a squash court lighting project and would like guidance on fixture selection, lighting calculations, LED replacement solutions, or customized mounting options, feel free to contact our team. We can help evaluate your facility, recommend suitable products, and develop a lighting solution tailored to your court dimensions, performance goals, and budget.